
RecordingOralHistories
AudioRecordingProcedures
TableofContents
RecordingOralHistoriesonaComputerUsingAudacity
SuggestedEquipment(Hardware)
InstallingSoftwareandDrivers
PreparingforanOralHistoryRecordingSession
RecordinganOralHistorySession
ProcessingtheRecording
RecordingOralHistoriesUsinganAndroidMobileDevice
SuggestedRecordingApps
EasyVoiceRecorder(Android)
RecordingOralHistoriesusingiOS
SuggestedRecordingApps
VoiceRecordPro(iOS)
UploadingOralHistoriestoNYHeritage
OrganizingFiles
CreatingCompoundObjectsinCONTENTdm
FixingCompoundObjectStructure&AddingMetadata
UsingtheInternetArchiveasanalternativeaccesslocationforaudioandvideofiles
RecordingOralHistoriesonaComputerUsing
Audacity
SuggestedEquipment(Hardware)
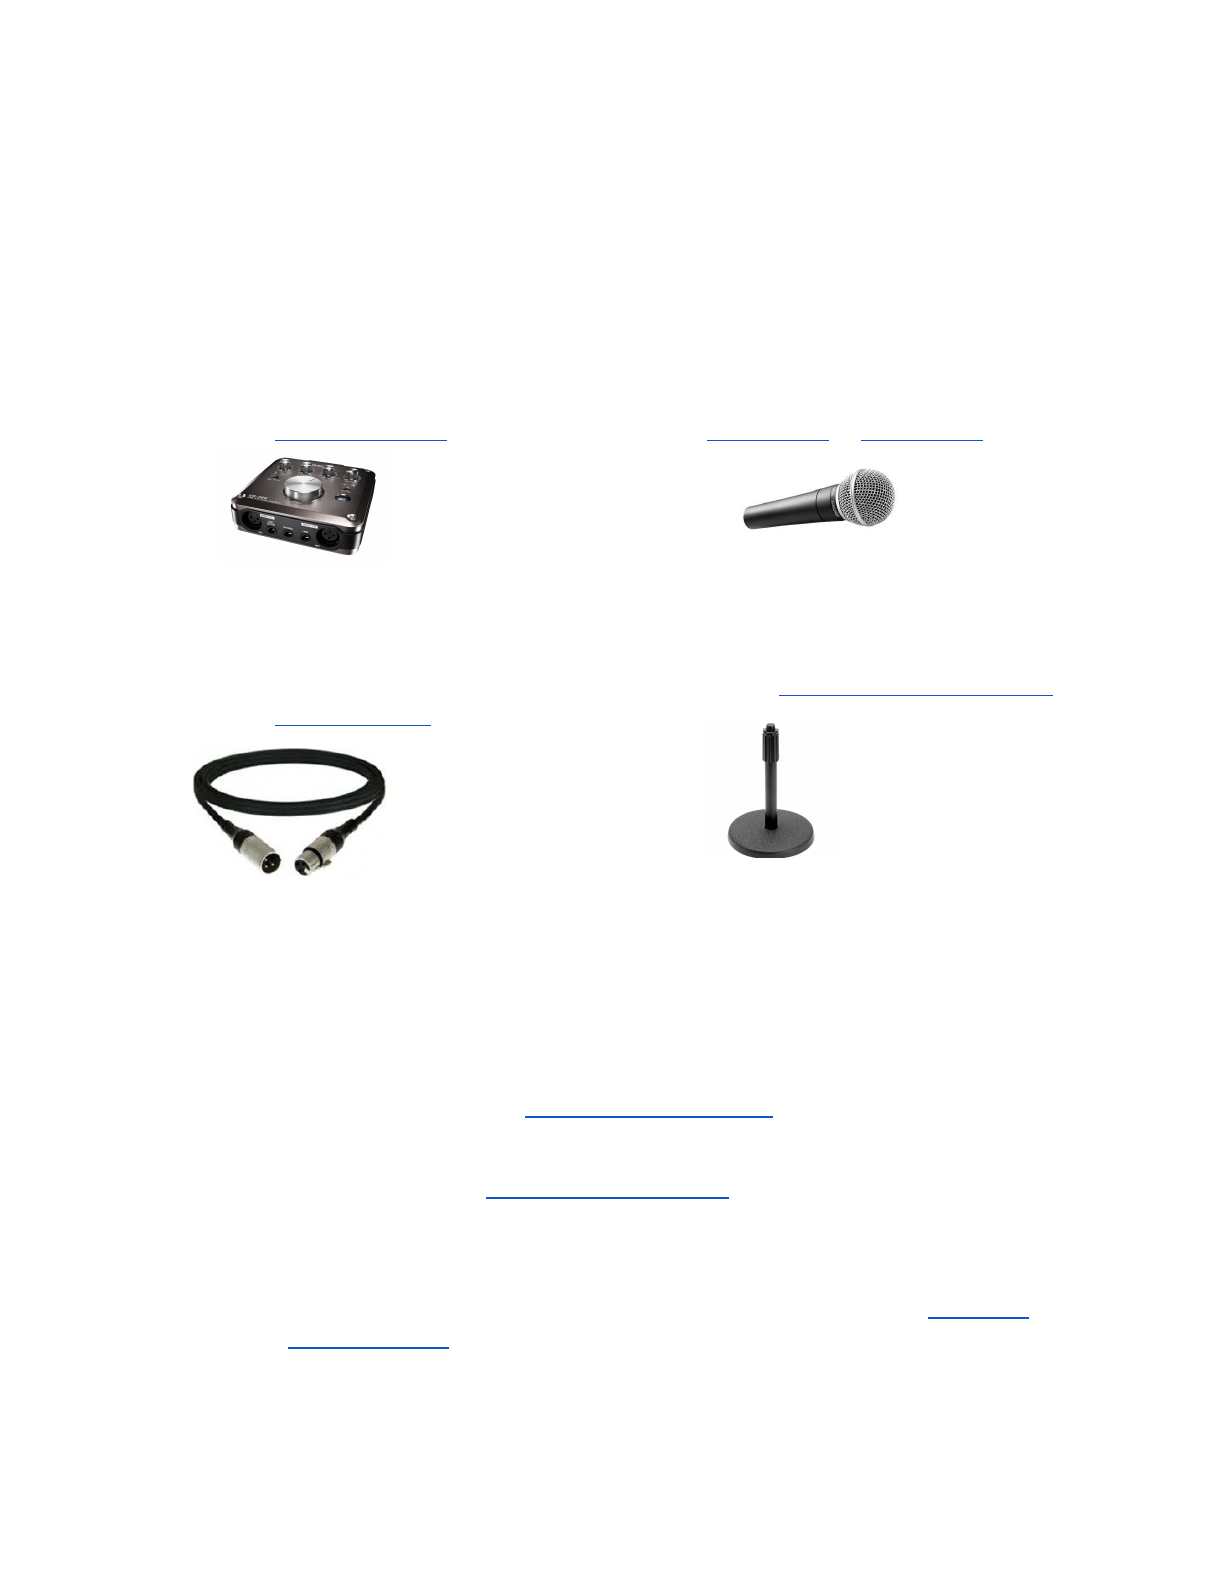
TascamUSBaudiomixer Twomicrophones(forinterviewer/narrator)
Suggested:
TASCAMUS366 Suggested:
ShureSM48orShureSM58
TwoXLRmicrophonecables Twomicrophonetablestands
(occasionallycomewithmicrophone) Suggested:
OnStagemicrophonestand
Suggested:
Hosa10’cables
LaptopordesktopcomputercapableofrunningAudacitysoftware
InstallingSoftwareandDrivers
1. InstallTascamDrivers:FindthedriversforthecorrectTascammodelunderthe“PC
audiointerface”headingontheTascamDownloadspage.Installthemostrecentdrivers
onthelaptopthatwillbeusedfortherecording.
2. InstallAudacity:FromtheAudacityDownloadpage,selecttheappropriatesystemfor
yourinstallation(Windows/Mac/Linux)—theinstalleristypicallymoreuserfriendlythan
thezipfile.
a. YouwillalsoneedtoinstalltheLAMEMP3encoderinordertocreateMP3
accesscopiesofyourrecordingstobeuploadedtoNYHeritage.Followthe
instructionsheretoinstalltheplugin.

PreparingforanOralHistoryRecordingSession
1. Beforeattemptingtorecordanoralhistory,youwill
wanttotestyourequipmentandbesurethatyouare
comfortablewiththesetup.
a. UsingthesuppliedUSBcable,plugthe
TascamintothecomputerwithAudacity
installed.
b. Putthemicrophonesonthestandsusingthe
suppliedmicrophoneclip.UsingXLRcables,
plugthemicrophonesintothe“MICIN”inputs.
c. EnsurethattheTascamissetupsuchthat:
i. INPUTvolumeknobsforboth
microphonesareturnedalmostallthe
waytotheright.[Toavoidclippingthe
signal,youwillnotwanttoturnthem
allthewayup.]Havingthevolume
around90%shouldworkformost
interviews.
ii. PHANTOMpower(48v)shouldbeset
toOFF.[Unlessyouhavea
condensermicrophonetheSM48or
SM58donotneedphantompower.]
iii. MakesuretheMIC/LINEGUITARswitchissettoMIC/LINE
iv. MONOshouldbesettoOFF.
v. ThePHONES/LINEOUTvolumeknobshouldalsobesettoaround90%
offullvolume.
vi. TheMONMIXknobshouldnotaffectthisrecordingprocess,soitcanbe
turnedallthewaytotheleft.
d. Onceyouhaveallofthesettingscorrect,trytalkingintobothofthemicrophones.
YoushouldseetheSIG/OL(signal)lightturnonwhileyouaretalking.Ifyoudo
notseeasignal,ensurethattheINPUTvolumeisupandthecableisinserted
snuglyonbothends.
2. OncetheTascamunitisproperlyconfigured,youwillneedtoopenAudacityandtestto
makesureyouhaveanaudiosignal.
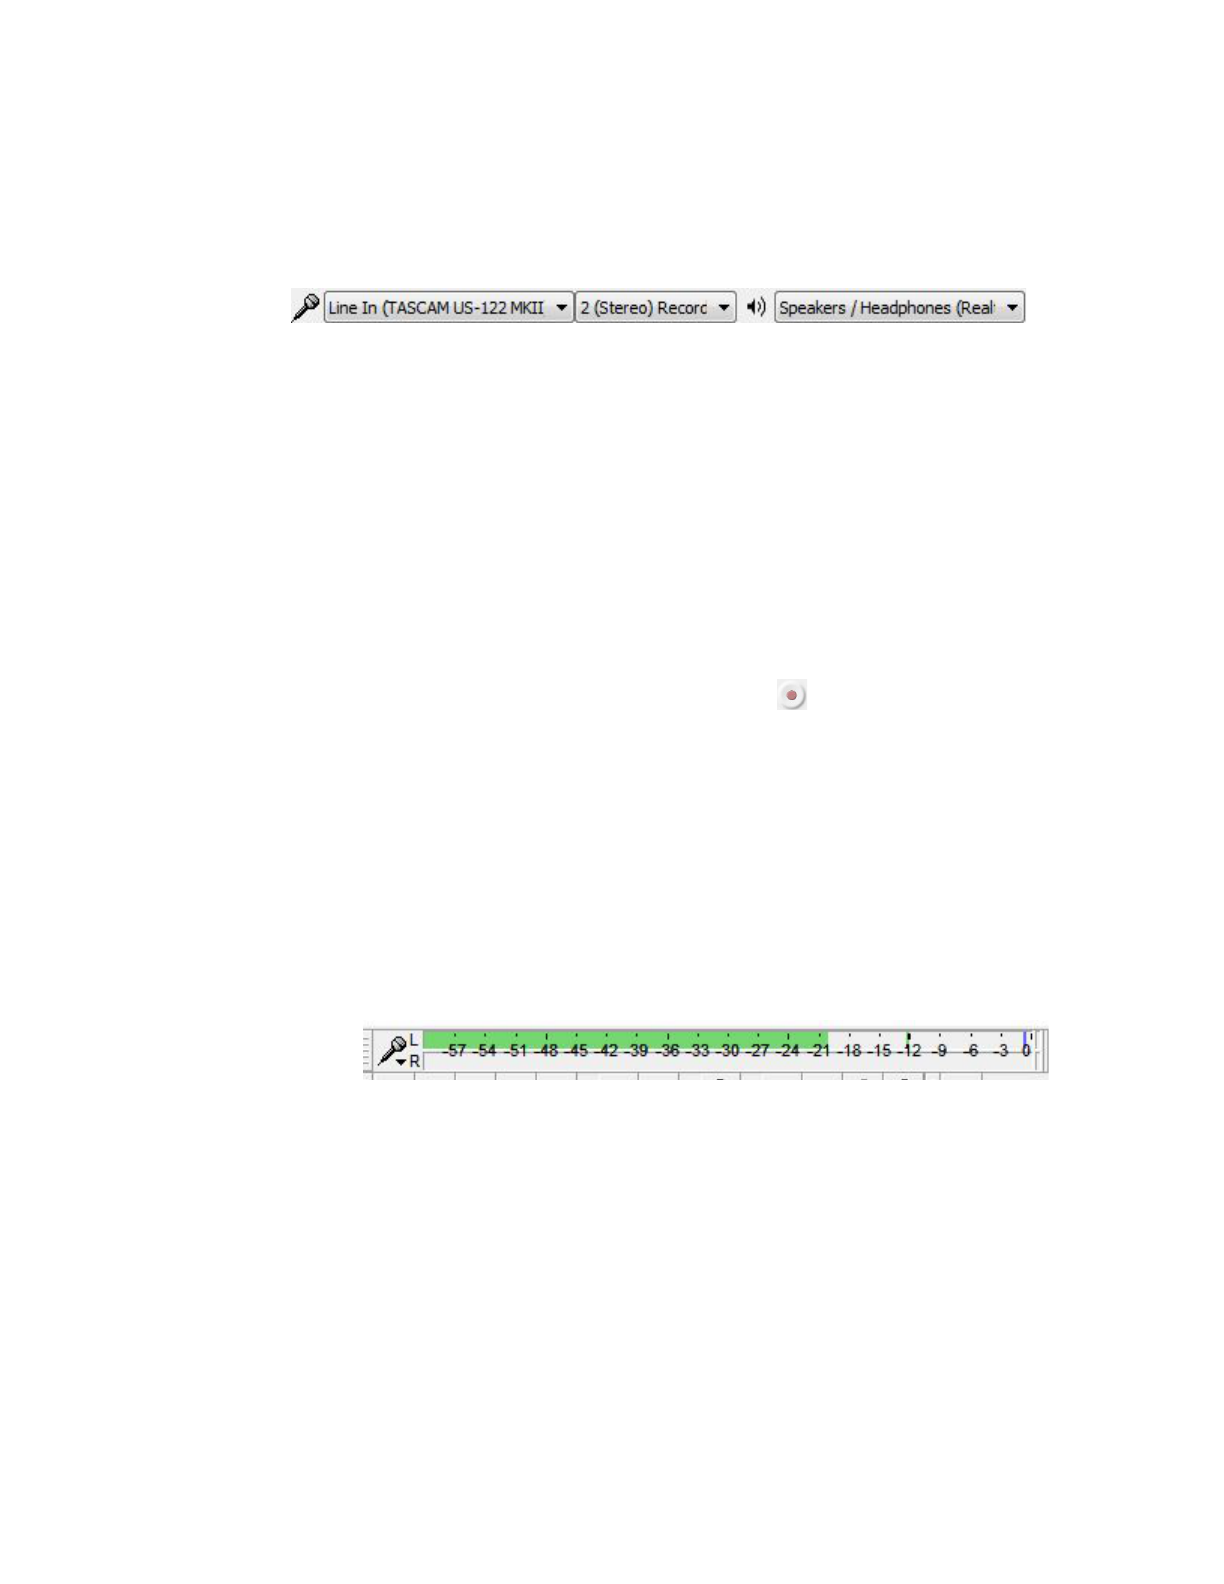
a. Makesurethatthemicrophoneissetto“LineIn(TASCAM)”andstereo
recording.
b. Onthetoolbar,gotoEdit>Preferences(Ctrl+P).Selectthequalitytabfromthe
lefthandcolumnandusethefollowingsettings.
i. DefaultSampleRate:48000Hz
ii. DefaultSampleFormat:24bit
iii. SampleRateConverter:HighQuality
iv. Dither:Shaped
v. SampleRateConverter:BestQuality(Slowest)
vi. Dither:Shaped
c. Click“OK”tosavethesettingsandreturntothemainscreen.
d. Beginarecordingusingthebuttonwiththered dot(Shift+R).
e. Whiletherecordingisrunning,speakintoeachmicrophoneseparately.Besure
tospeakinareasonablyloudvoice,atleast35inchesawayfromthe
microphone.
i. Eachmicrophoneshouldrecordtoaseparatechannel(RightandLeft).
Thesignal,asmeasuredbythegreenbaratthetopofthescreen,should
ideallybebetween30and10db.Ifthesignalturnsred,thisisan
indicationthatthesignalisclippingandwillbedistortedwhenplayed
back.
ii. Ifthesignalistoostrong(loud)thenturndowntheINPUTL/Rvolumefor
thatmicrophoneontheTascamandtestthemicrophoneagain.Ifitistoo
low(quiet)thentheINPUTL/Rwillneedtobeturnedup.
f. Endtherecordingbyclickingthestop buttonorpressingthe
spacebar.
g. Playbacktherecordingbyplacingthecursortotheleftoftherecordingwave
andclickingthegreenplay buttonorbypressingthespacebar.
i. Confirmthattherecordingisaudibleatnormalvolumelevelsandfreeof
staticorotherdistortions.AdjusttheINPUTL/RontheTascam
accordingly.
h. Repeatthisprocessasnecessaryuntilyourlevelsarewithintherangeof30
10db.
i. Ifyouareunabletogetthesignallevelatanappropriatelevelusingthe
INPUTL/Radjustment,thenyoumayneedtoadjustthePHONES/LINE
OUTlevel,orthemicrophonevolumewithinAudacity.
ii. Insomecases,itmaybenecessarytogointoyouroperatingsystem’s
microphonesettingsandmakeadjustmentsthere.
3. Ensurethatyouhaveasignificantamountofspaceavailableonthelaptopyouwillbe
usingtorecord.Somewhereintherangeof1050GBshouldbesufficientformost
recordings
RecordinganOralHistorySession
1. Ideally,theinterviewshouldbeconductedinaspacewithminimalambientnoiseor
distractions.Largerroomstendtosoundbetter,astheyarelesslikelytoproduce
reverberationsandechoes.Carpeting,curtains,andothersoftordeflectingsurfaces
tendtoimprovearoom’sacoustics.
2. Takingaphotographofthenarratorisrecommended.Thisimagecanbeusedasa
visualrepresentationfortheoralhistoryinNewYorkHeritageorelsewhere.
3. Placeonemicrophonefacingthenarratorandtheotherfacingtheinterviewer.Thiswill
allowbothsidesoftheinterviewtoberecordedwithclarity.EnsuretheTASCAMis
properlyconnectedandsettothelevelsdeterminedinthestepsabove.
4. Ithelpstogivethenarratorthatisbeinginterviewedaquicklessoninhowtousethe
microphone(speakloudly,positionthemicrophone35inchesfromtheirmouth).
a. Beforebeginningtheinterview,itwouldbebeneficialtotestthemicrophoneswith
thenarrator(usingtheprocedureoutlinedinthestepsabove).Thishasthe
doublebenefitofensuringtheequipmentworksandconfirmingthatthenarrator
isaudibleintherecording.
5. Oncethelevelsarewithinanacceptablerange,clicktherecordbutton(Shift+R)to
beginrecording.
a. Pausingorstoppingtherecordingisnotrecommended,especiallysinceitis
relativelyeasytoeditarecordingafterthefact.Iftherecordingisstoppedand
restarted,Audacitymaybeginanewaudiotrackbelowthepreviousone.This
canbeavoidedbyplacingthecursorattheendofthepreviousrecording,which
startthenextrecordingatthatlocation.
6. Clickonthestopbuttonorpressthespacebartoendtherecording.
a. Replayingaportionoftherecordingwillgiveyouanopportunitytoensurethat
thesoundqualityisadequate.
7. SaveeachinterviewasanAudacityprojectusingthedateofrecordingandthe
narrator’sname.
a. AudacitysavefilesincludeanAudacityProjectFile(.aup)andacorresponding
folderwiththecomponentsegmentsoftherecording.Besuretoincludethedata
folderifyouarecopyingthissavefiletoanotherlocation.
ProcessingtheRecording
1. OpentheAudacityProjectFilethatyousavedafterconductingthe
recording.
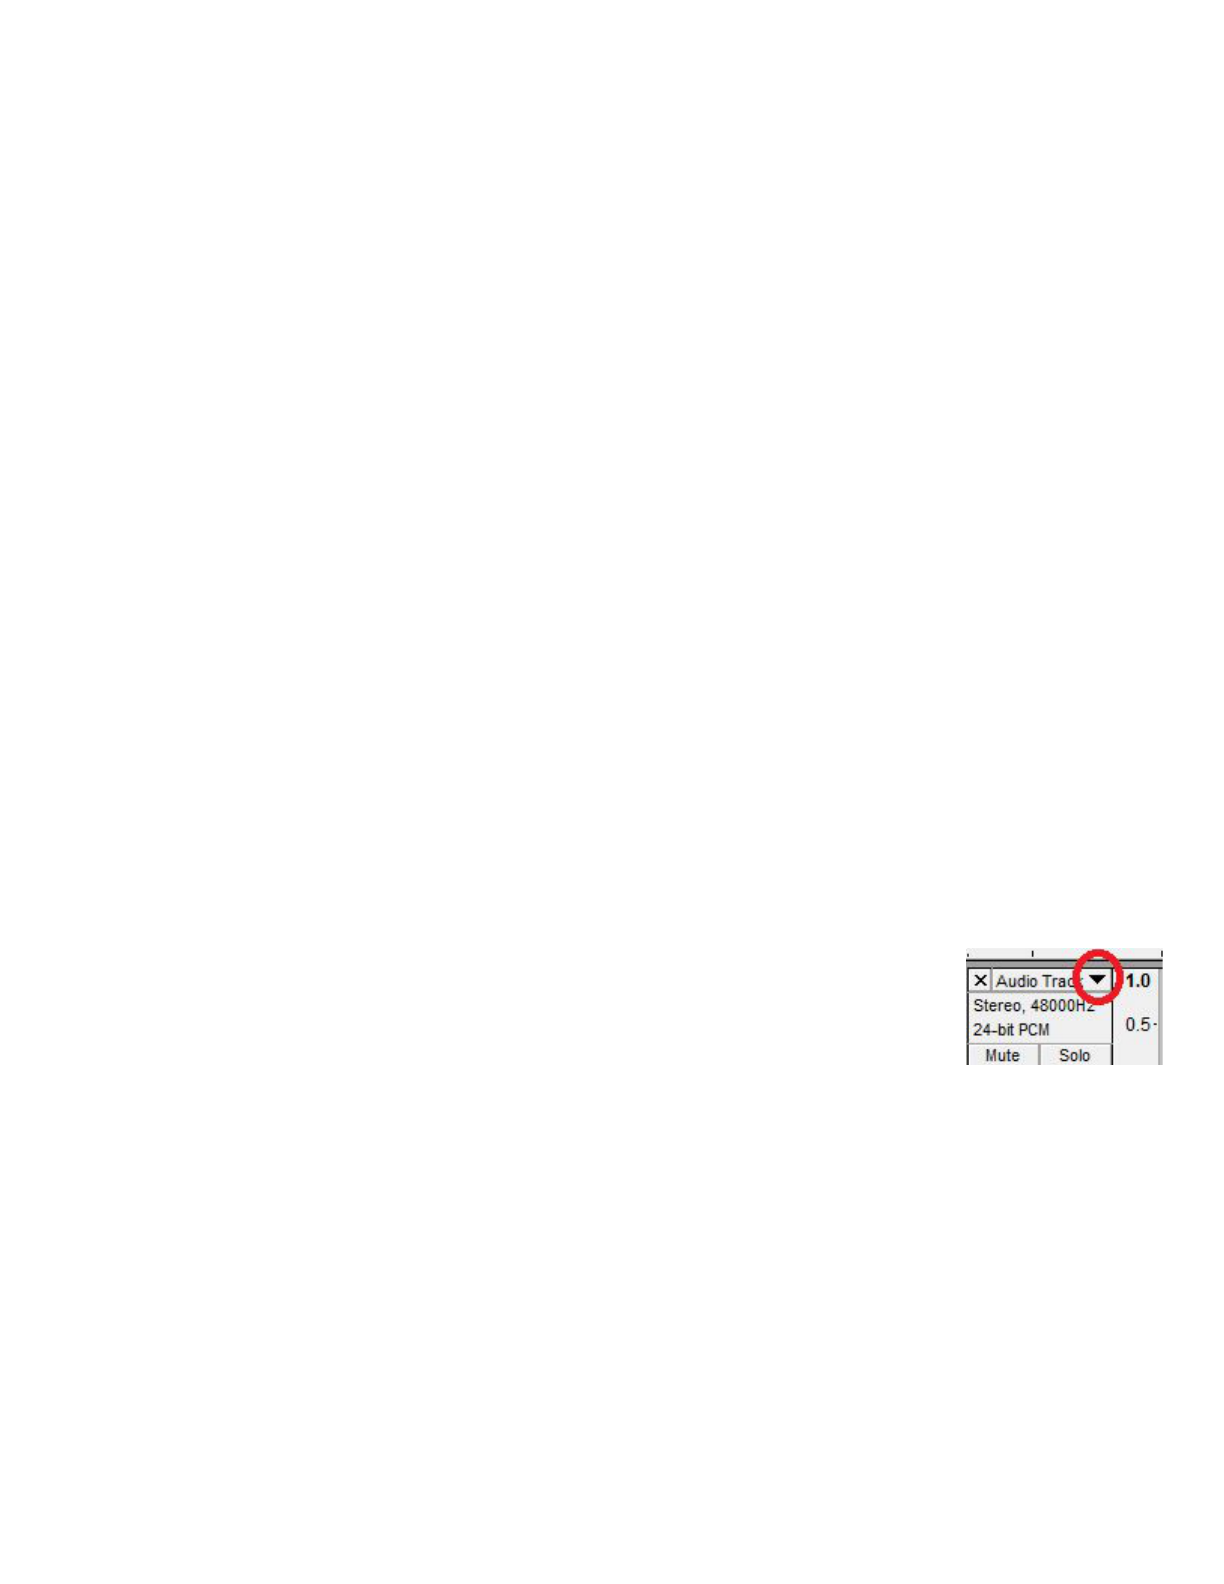
2. Clickonthedropdownmenunextto“AudioTrack”intheupperleftcornerof
therecordingtrackandselect“SplitStereotoMono.”
a. Thiswillcreatetwoseparateaudiotracks—oneforthenarratorandtheotherfor
theinterviewer.Bymakingeachtrackmono,themicrophoneswillnotbepanned
toRandLastheyareintheoriginalrecording.Thiswillalsoallowforadjusting
thevolumeofthenarratorandinterviewerindependently.
3. Beforeeditingthefileanyfurther,youwillneedtoexportamaster/archivalversionofthe
file.Thiswillmaintaintheintegrityoftheoriginalrecording,whiletheaccesscopythat
willbeproducedlatercanbeeditedforclarity.
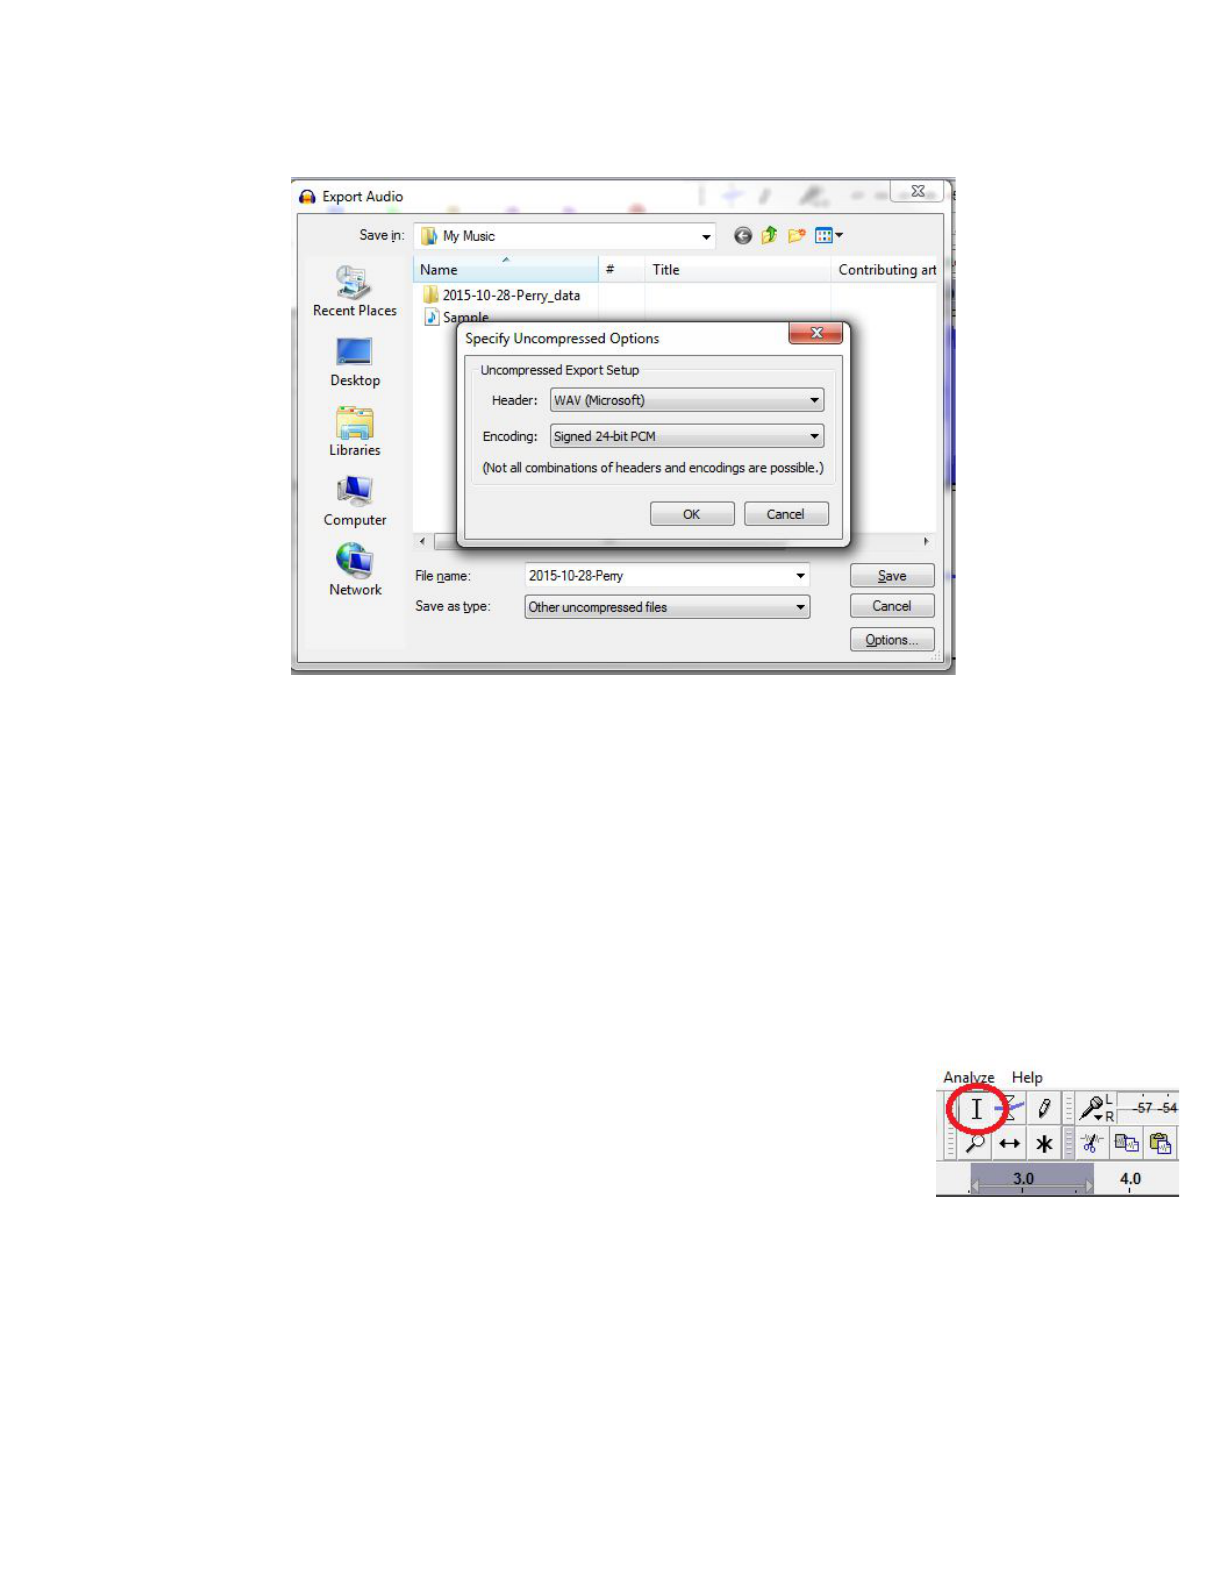
a. Exportthemastercopy
i. Onthemenubar,clickFile>ExportAudio(Ctrl+Shift+E)
ii. Select“Otheruncompressedfiles”inthe“Saveastype”field(underthe
“Filename”)
iii. Clickon“Options”andsettheHeaderas“WAV(Microsoft)”andthe
Encodingas“Signed24bitPCM,”thenclickOK.
iv. Ensurethatthefilenameconformstothenamingconventionsthatyou
arefollowingandclickSave.
v. Whenpromptedthatthe“trackswillbemixedtoasinglemonochannel,”
clickOK.Itisnotnecessarytoaddmetadatatothefileitself.
Steps35shouldbetakenonlyifnecessaryandonlytoimproveclarity.Editingofthe
recordingshouldbekepttoaminimaltopreservetheintegrityofthe
originalrecording.
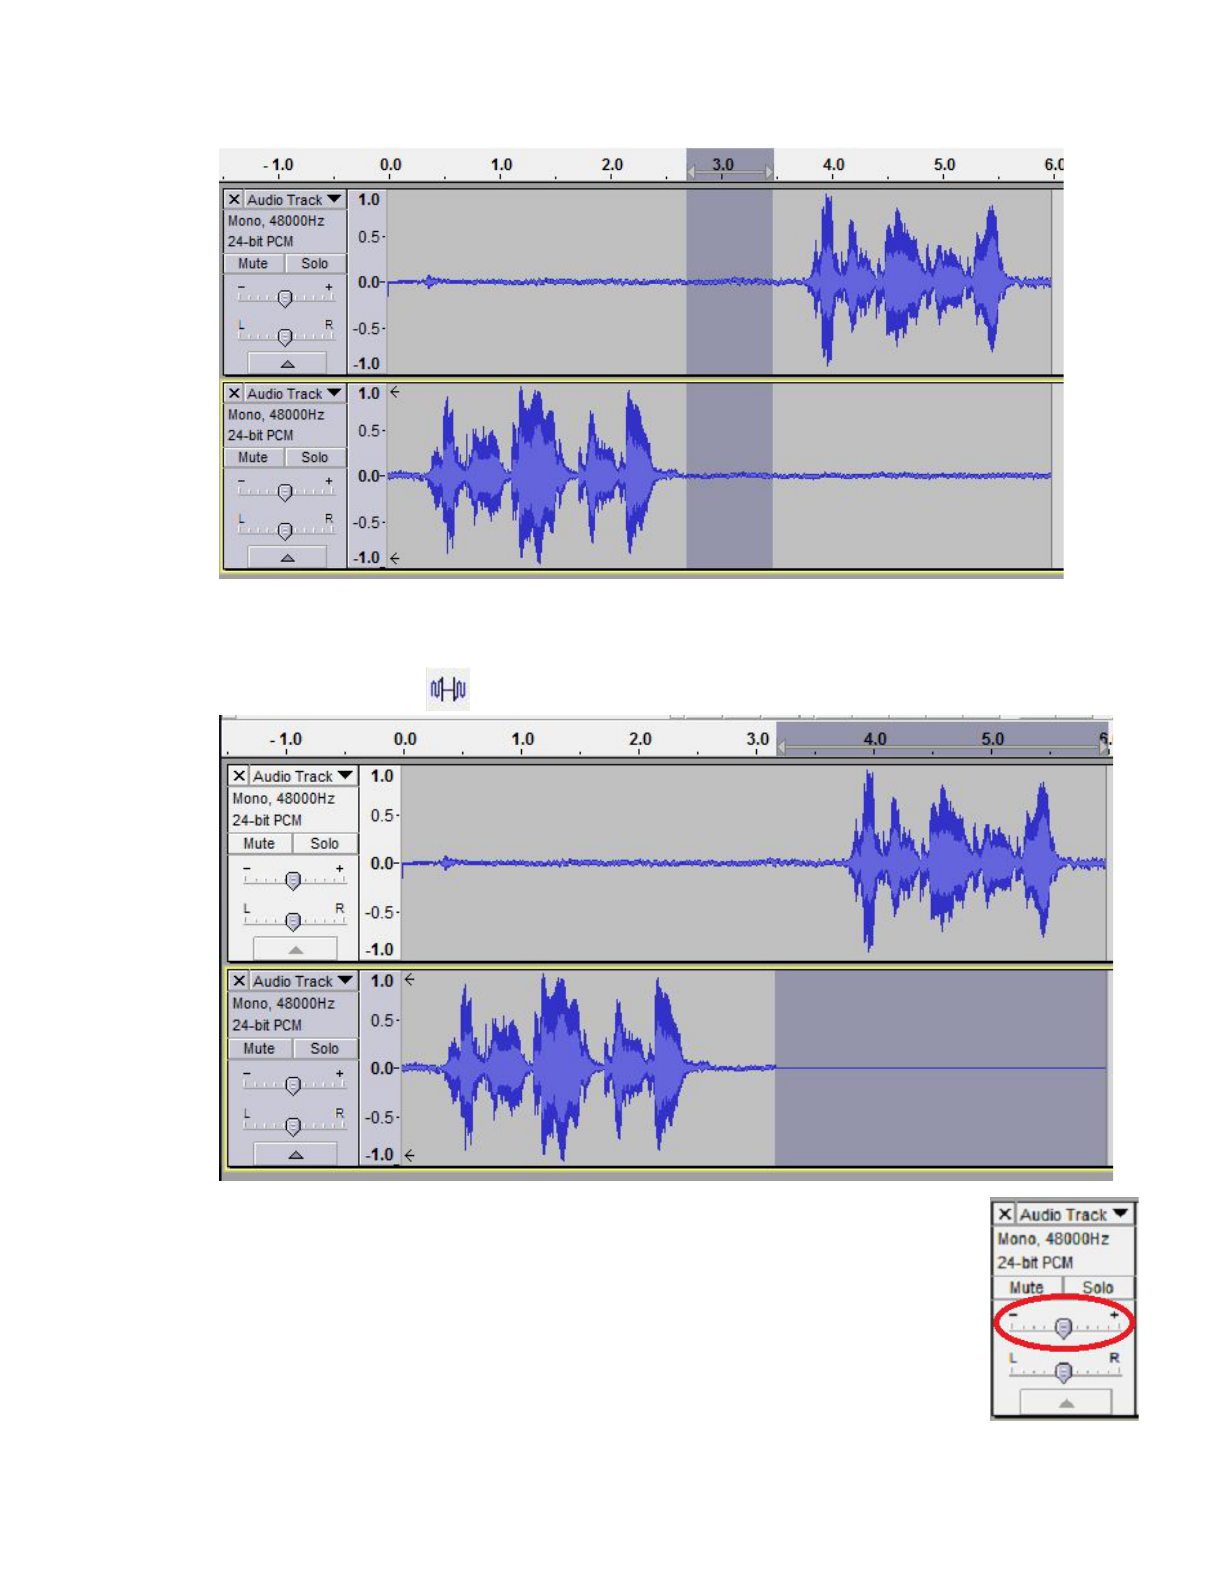
4. Removeanylongsilences(especiallyatthebeginningandendofthe
recording)bydraggingacrosstheunwantedsectionsusingthecursor
tool,makingsuretodragacrossbothrecordingstoensurethatthe
audioisremovedfrombothtracks.Thesectiontobedeletedwillbe
highlightedingrey.Pressthedeletekeytoremovetheselectedsection.Besureto
leavesomeblankspaceoneithersideoftherecordingsothattherecordingdoesnot
start/stopabruptly.
5. Toremoveunwantednoisefromonemicrophone(e.g.iftheinterviewercoughswhile
thenarratorisspeaking),highlightthesectionofthetracktobesilencedandclickonthe
SilenceAudiobutton.
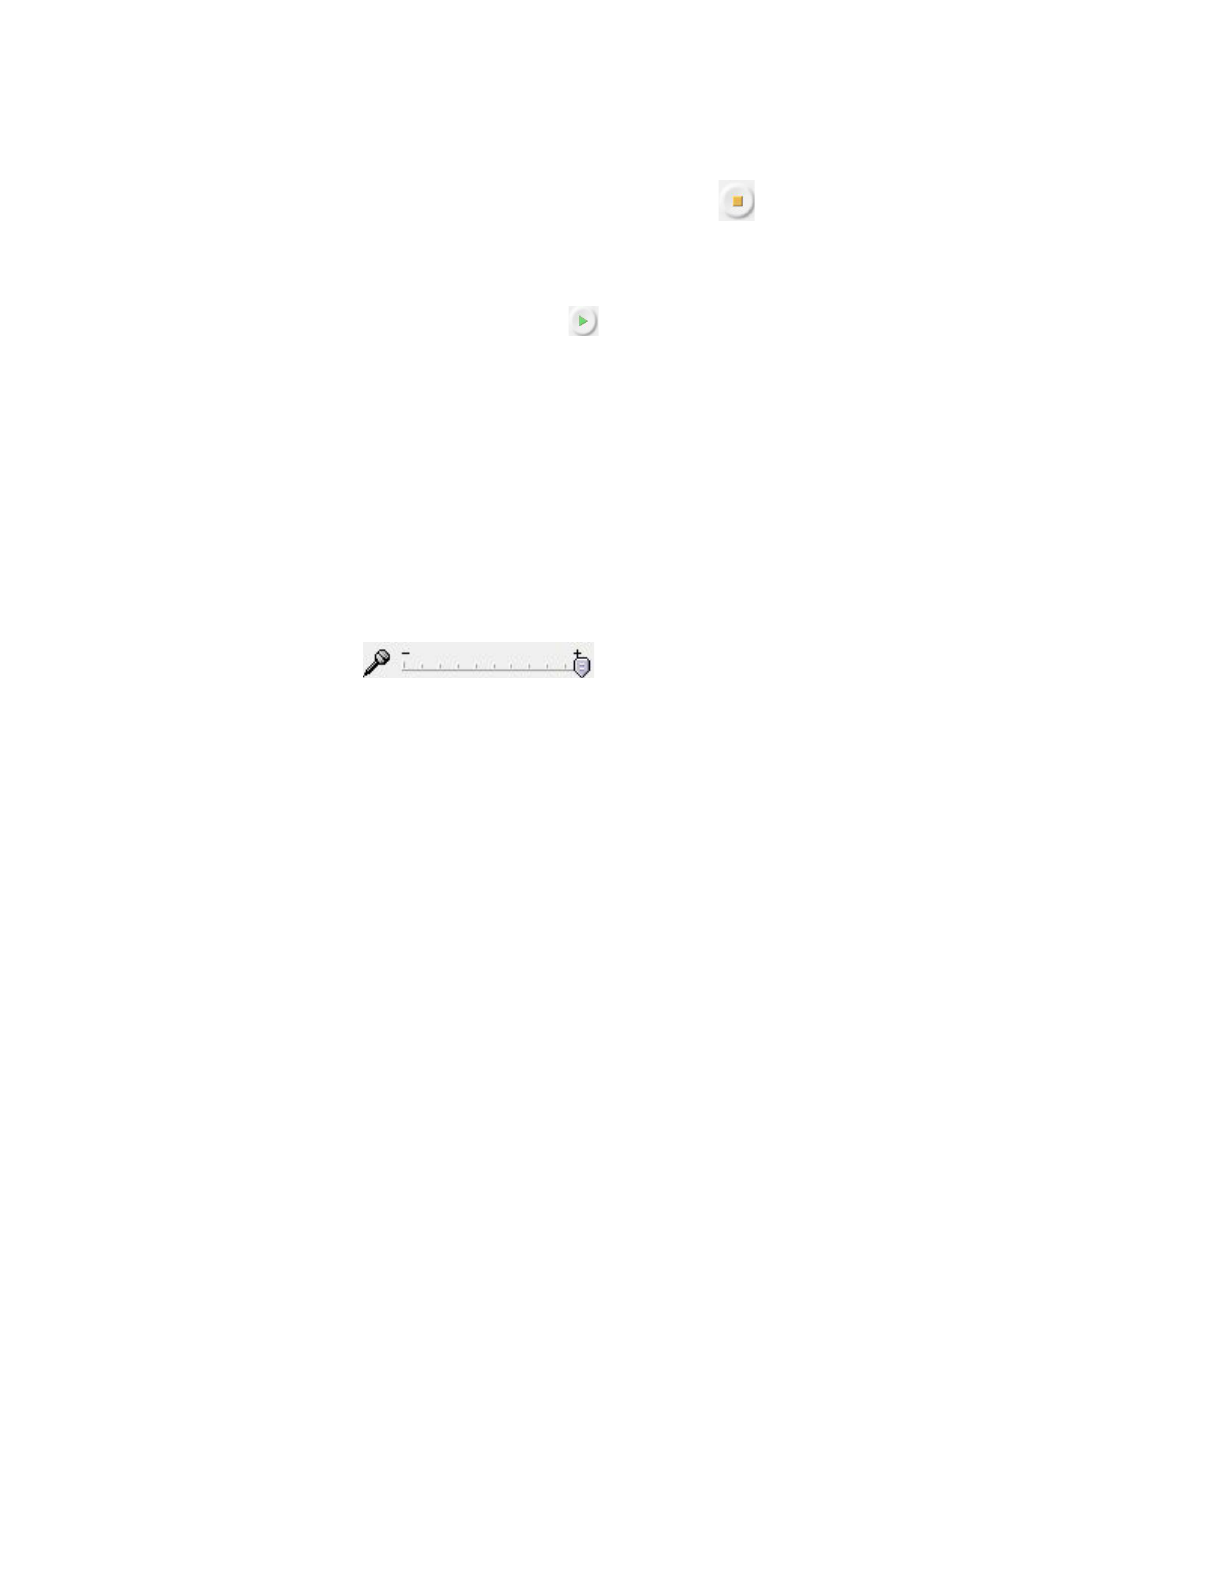
6. Ifthenarratororinterviewerisnoticeablylouderthantheother,thevolumeof
theindividualmicrophonescanbeadjustedusingthegainsliderforthattrack.
Makeanadjustment,thenlistentotherecordingtoensurethevolumessound
likeaclosermatch.
7. Oncetherecordinghasbeenedited,itwillbenecessarytoexporttheaudiofile
intoanaccesscopyforuseonNYHeritageorotherwebapplications.
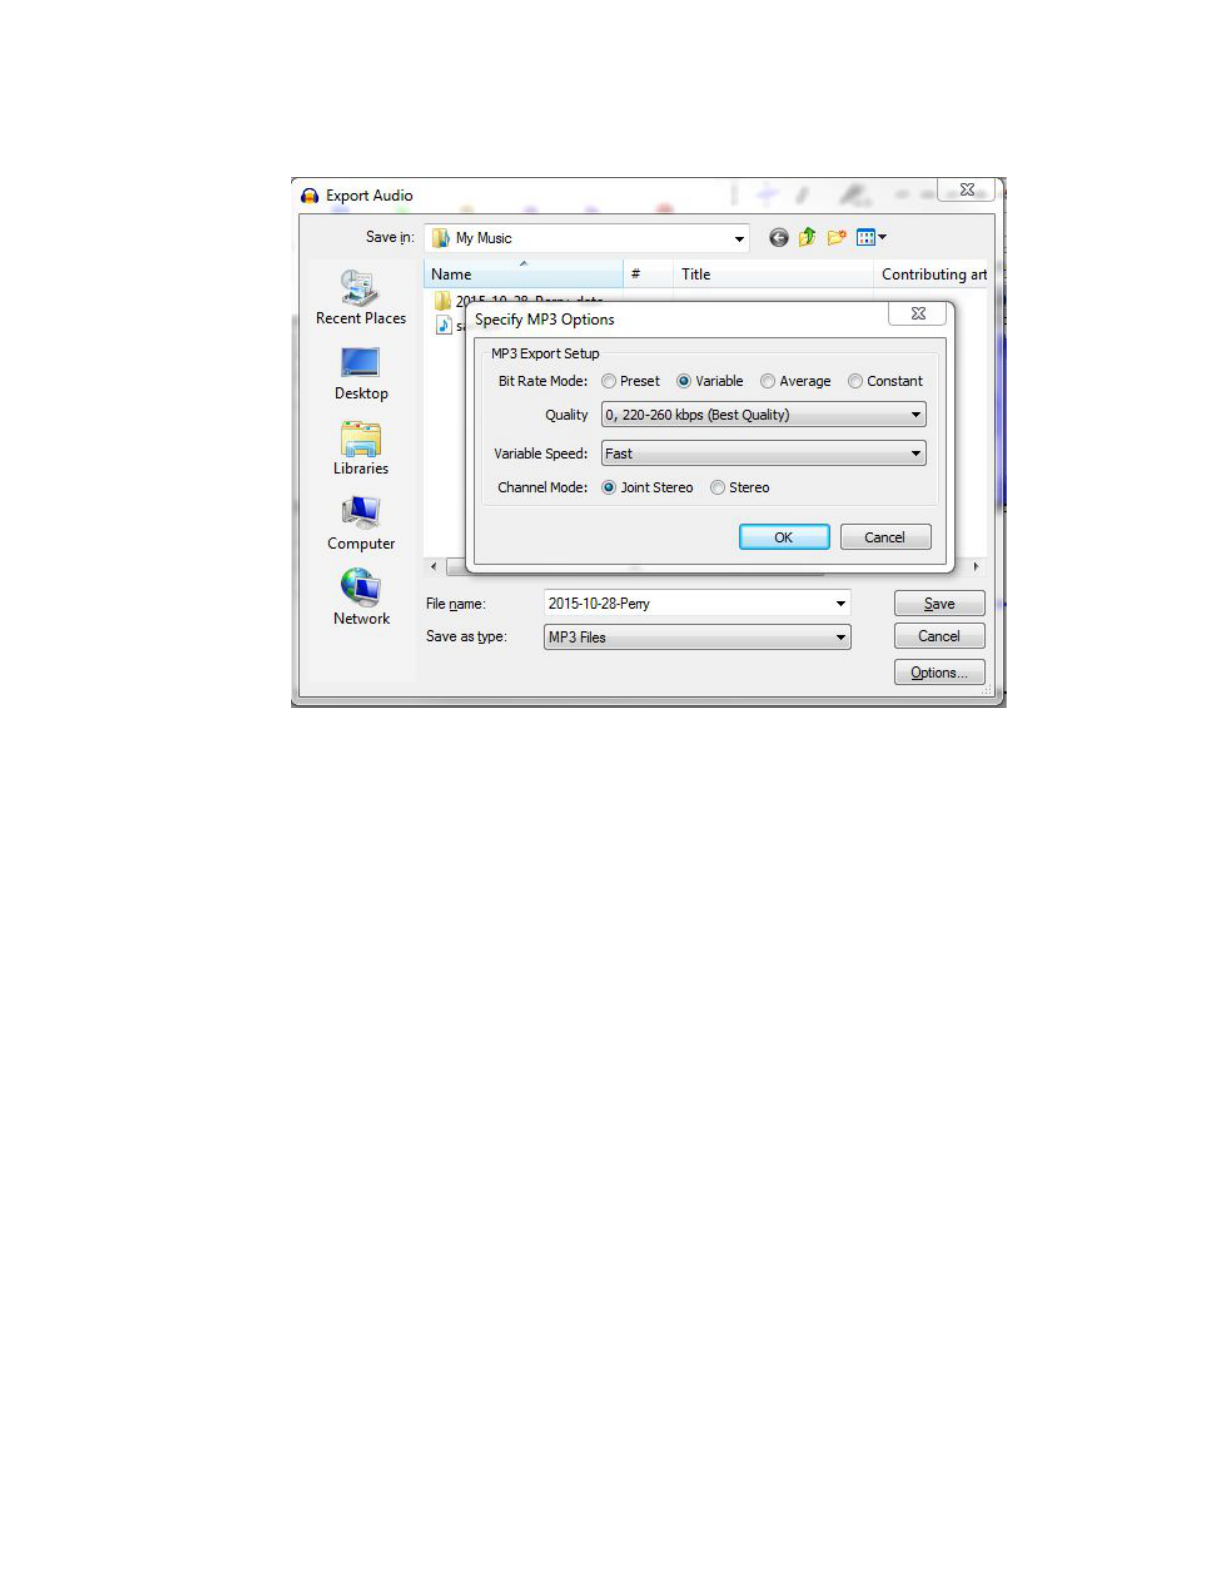
a. Exporttheaccessfile
i. Onthemenubar,clickFile>ExportAudio(Ctrl+Shift+E)
ii. Select“MP3Files”inthe“Saveastype”field(underthe“Filename”)
iii. Clickon“Options,”settheBitRateModeto“Variable,”theQualityto“0,
220260kbps(BestQuality),”VariableSpeedto“Fast,”andChannel
Modeto“Stereo,”thenclickOK.
iv. Ensurethatthefilenameconformstothenamingconventionsthatyou
arefollowingandclickSave.
v. Whenpromptedthatthe“trackswillbemixedtoasinglemonochannel,”
clickOK.Itisnotnecessarytoaddmetadatatothefileitself.
vi. Intheinvalidsampleratedialog,setthesamplerateto“4100”
8. TheaccessfileisreadytobeuploadedtoNewYorkHeritageviatheCONTENTdm
ProjectClient.
9. Onceyouhaveexportedthefilesandtestedthemtobesuretheywork,youmaydelete
theAudacityProjectFileandthecorrespondingfolder.
10. Withtherecordingfinalized,ideallyawrittentranscriptshouldbemadefromthe
recording.Thesetranscriptsshouldbewrittenverbatimandincludetimestampsfrom
theoriginalrecording.

RecordingOralHistoriesUsinganAndroidMobile
Device
SuggestedRecordingApps
● EasyVoiceRecorder(Free/Pro—$3.99)
○ Recordsinhighqualityfileformat(16bit,44.1kHz)
○ Displaysrecordinglevelsandproversionallowsforboostingrecordingvolume
○ Fileseasilyexportedtocloudservicesoracomputer
Recommendedfor:havingmorecontroloverrecordingqualityandoutputfilesfor
archivalpurposes
● StoryCorps(Free)
○ Easytousewithbuiltininterviewquestionprompts
○ Filesrecordedinlowerqualitywithoutdisplayinglevels
○ UploadstodirectlyStoryCorpsaccount,filescanbedownloadedfromwebsite
Recommendedfor:easeofuseinacompletepackage,popularplatformforsharingoral
histories
EasyVoiceRecorder(Android)
1. PlaceyourdeviceintoAirplanemodeandsilenceallnotificationsandalarmsthatcould
disturbtherecordingprocess.Ensurethatthedevicebatteryisfullandavoid
plugginginthephonewhilerecording.
2. DownloadtheappfromtheGooglePlayStoreontothedevicethatwillbeusedtorecord
a. Thefreeappoffersthemajorityofnecessaryfeatures
b. theproversionisadfreeandallowsfortheboostingofrecordingvolume
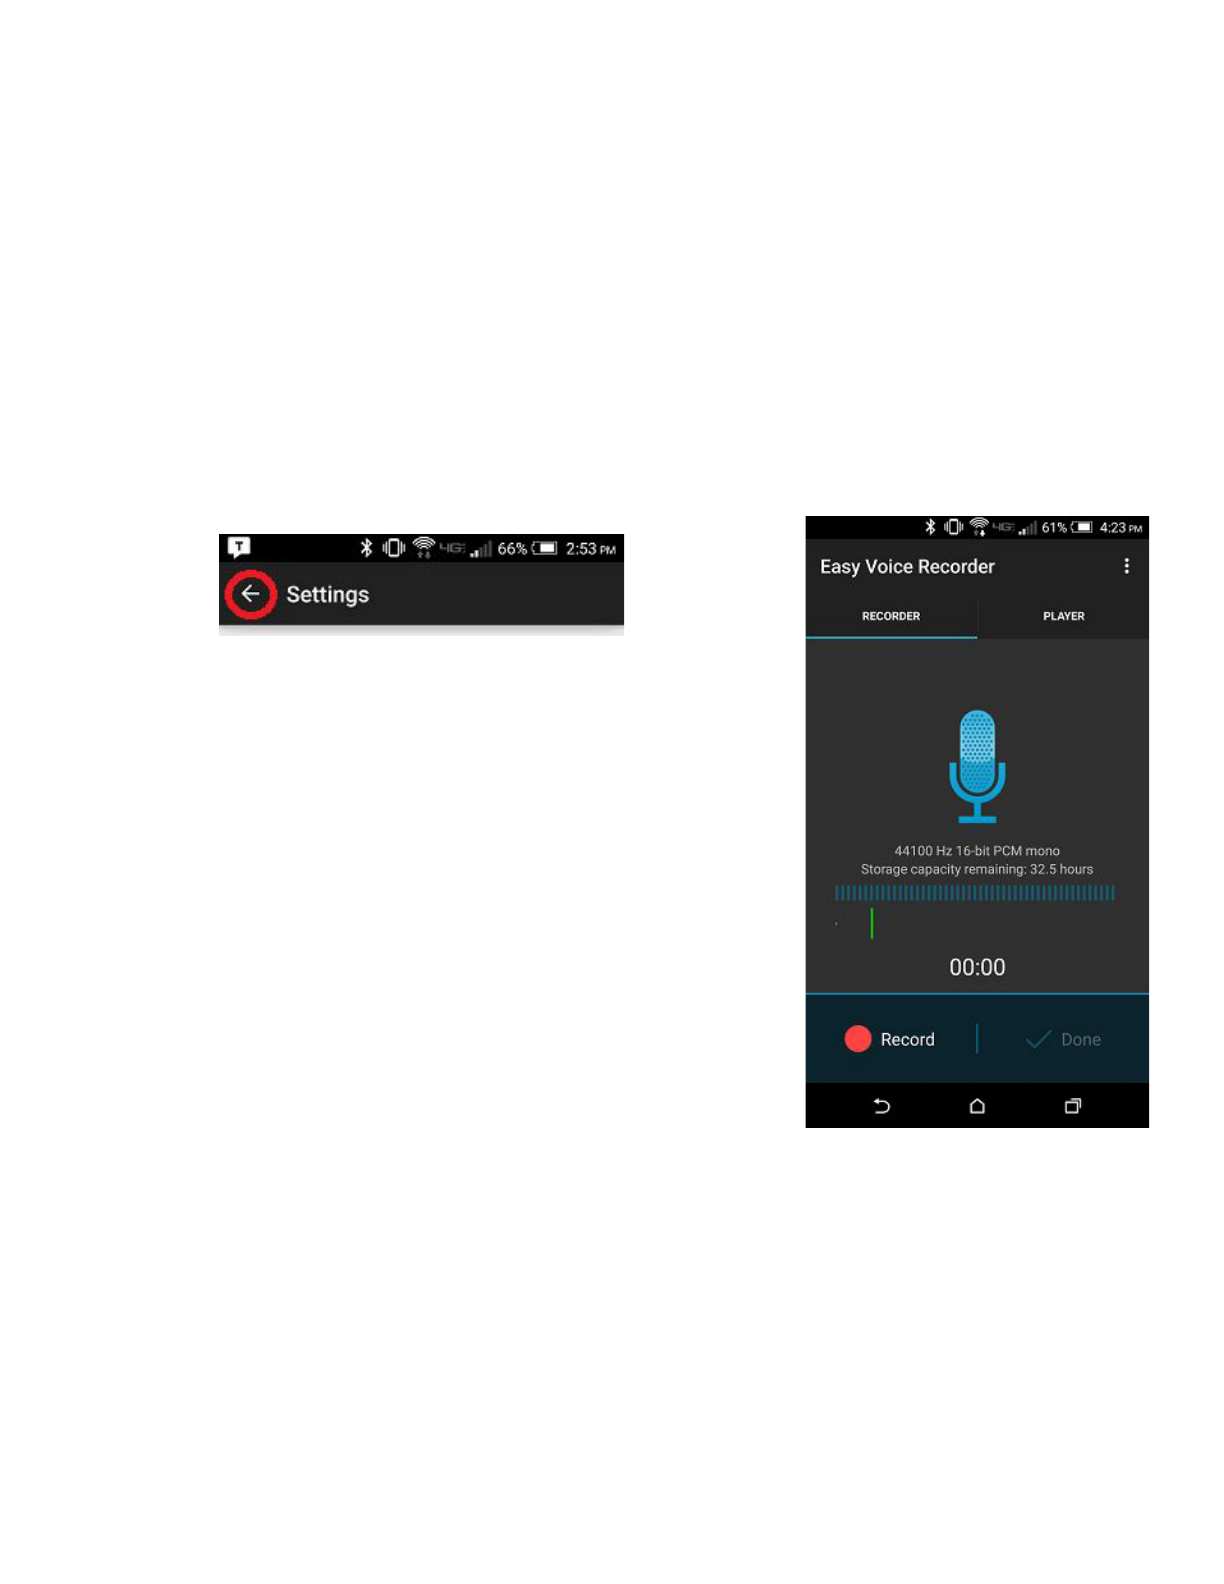
3. Opentheappandaccessthesettingsmenubypressingthethreedotsintheupperright
cornerofthescreen.
4. Onthesettingsscreen,ensurethattheappissettothefollowingoptions:
a. MainUse:“Meetingsandlectures”(thissetstherecordingvolume)
b. Soundquality:“High(largerfiles)”
c. Underthe“Tuning”submenu:
i. Microphone:“Main”
ii. Encoding:“.wav(PCM,5MB/minute)”
iii. Samplerate:44kHz(CD)
d. InterfaceandAdvanced&Troubleshootingshouldnotneedchanging
5. Selectthebackarrowtoreturntothemainscreen
6. Placeyourphoneortabletfaceuponatable,equidistant
betweenallpeoplewhowillbespeaking.
7. Testtherecordingprocesstoensurefavorablelevels:
a. BeginrecordingbypressingtheredRecordbutton
orthebluemicrophoneicon.
b. Whilesomeoneistalking,thelevelmeter(below
“Storagecapacityremaining”)shouldshowalevel
between2575%ofthebars.Ifitflashesred,
thenmovethephonefurtheraway,ifitisonly
showingacouplebars,thenmoveitcloseror
speaklouder.
c. Whenyouaredonerecording,press“Done”
d. Verifythattherecordingsoundsadequate,switch
tothePlayerscreenandpressonthenameoftherecording.
e. Ifneeded,youcanreturntothesettingspageandselectanotheroptionunder
“Mainuse.”(“Musicandrawsound”appearstobringtherecordingvolumedown,
while“voicenotes”bringsitup).Thepaidversionhasa“Microphoneboost
(gain)”sliderintheTuningsettings,whichallowsformorecontrolover
microphonevolumethehigherthegain(measuredindecibels),thelouderthe
recordingwillbe.
f. Onceyouhavethesesettingsatfavorablelevels,you’rereadytorecordthe
interview.
8. Beforerecording:
a. PlaceyourdeviceintoAirplanemodeandsilenceallnotificationsandalarmsthat
coulddisturbtherecordingprocess.
b. Ensurethatthedevicebatteryisfullandavoidplugginginthedevicewhile
recording.
9. Placethemobiledevicefaceuponatablebetweentheinterviewerandthenarrator(the
deviceshouldberoughly610inchesfromeachperson).Beginrecordingtheoral
historyinterviewbypressingtheredRecordbutton.Ideallytherecordingshouldnotbe
pausedasitispossibletocutoutdeadtimeafterthefact.Trynottotouchthephoneat
allduringtherecordingprocess,ashandlingnoisewilloftenbeperceptibleinthe
recording.
10. PressDonetoendtherecording.
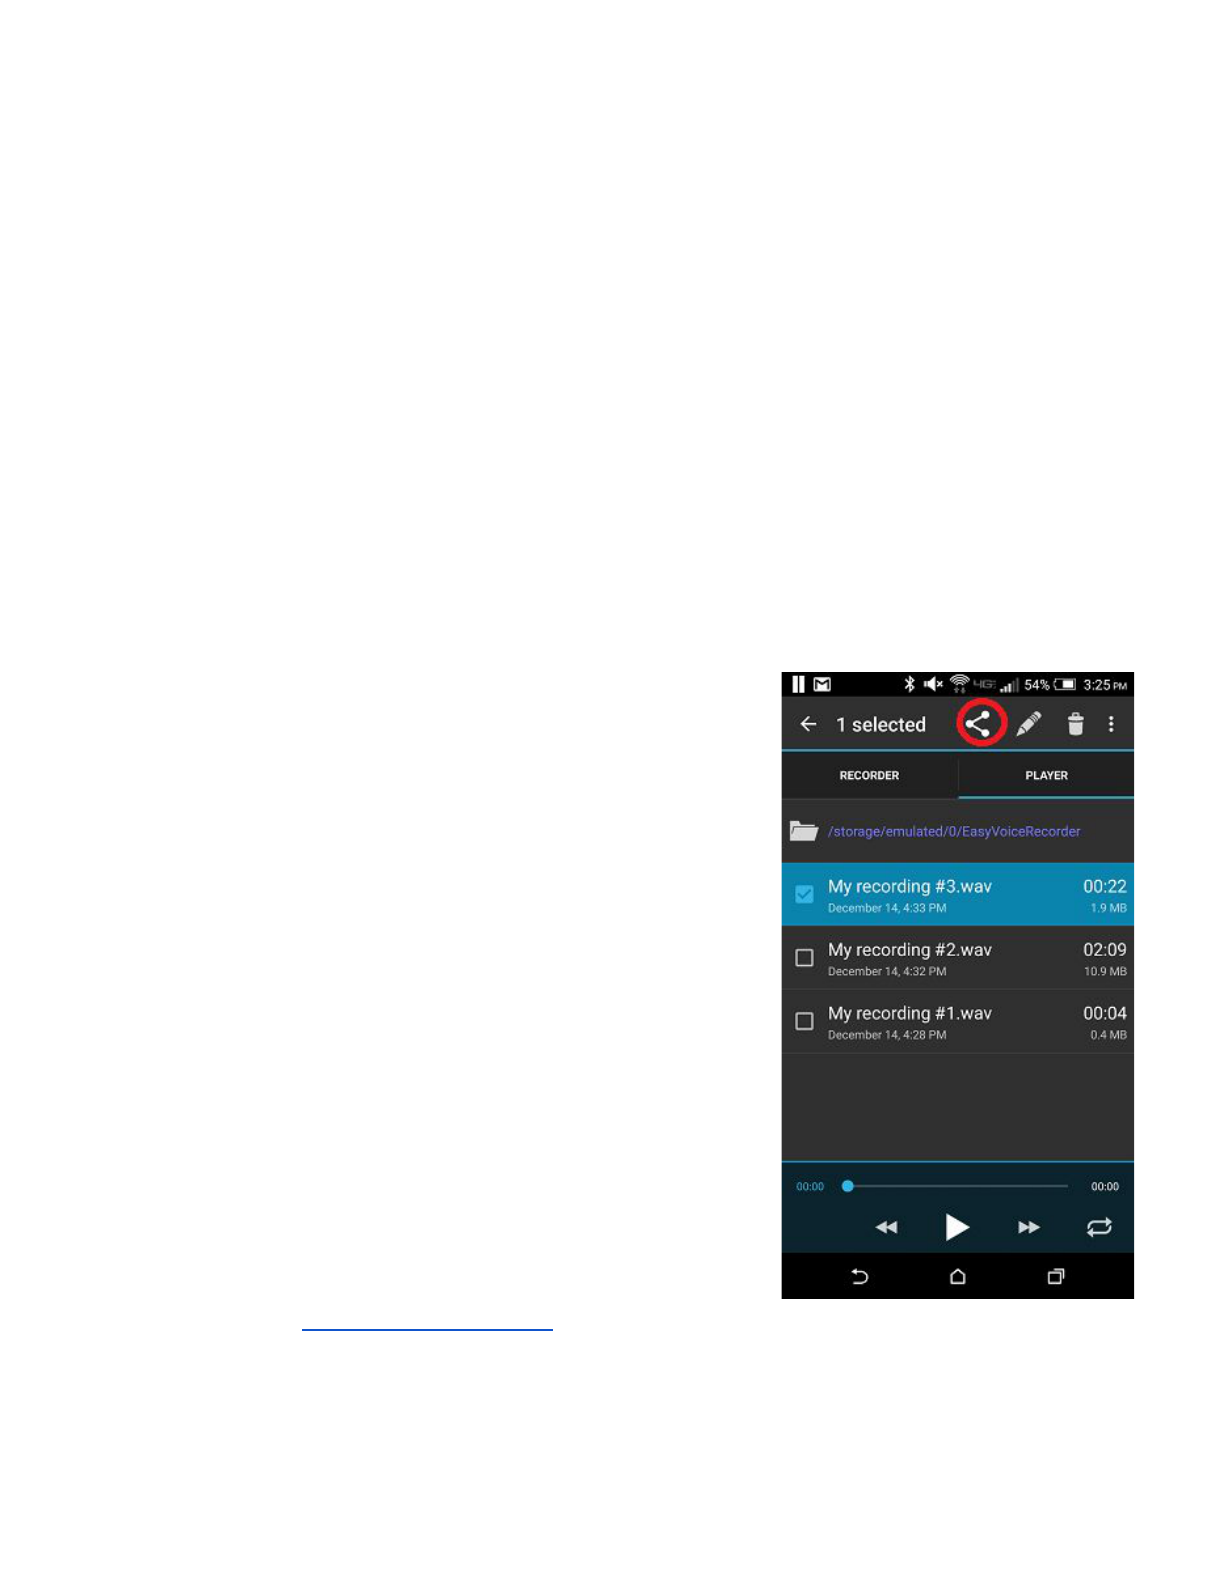
11. Aftercompletingtherecording,gototheplayerview
(accessiblebypressing“Player”abovethemicrophone
icon).
a. Youmayplaybacktherecordingtoconfirmthat
thesoundisacceptable
12. Tomovetherecordingstoacomputerforediting,select
therecording(s)thatyouwouldlikesavedbychecking
theboxtotheleftofeachrecording.
a. Pressthesharingbutton(threedotsconnected
bylines,circledinredonthescreenshottothe
right)
b. Chooseafilesharingplatformthatyouuse
(GoogleDrive,Dropbox,Box,etc)touploadthe
fileintothecloud
13. Thefile(s)willnowbeaccessibleonadesktop
computerwithAudacity,whichcanbeusedtoeditthe
recordingandexportitintoaccessandarchivalfiles.
(seetheProcessingtheRecordingsectionabove)

a. Whenopeningthe.wavfileinAudacity,youwillbepromptedtochoosean
importmethod,it’srecommendedto“makeacopyoftherecordingbefore
editing”incaseyoumakeamistakeandneedtogobacktothesourcerecording.
b. Therewillbenoneedtousethe“SplitStereotoMono”function,sincethe
recordingwillalreadybeintheproperformat

RecordingOralHistoriesusingiOS
SuggestedRecordingApps
● VoiceRecordPro(Free)
○ Includesgranularsettingsforadjustingrecordingquality
○ Easytochangerecordingvolume
○ Somewhatunintuitiveuserinterface
Recommendedfor:havingmorecontroloverrecordingqualityandoutputfilesfor
archivalpurposes
● StoryCorps(Free)
○ Easytousewithbuiltininterviewquestionprompts
○ Filesrecordedinlowerqualitywithoutdisplayinglevels
○ UploadstodirectlyStoryCorpsaccount,filescanbedownloadedfromwebsite
Recommendedfor:easeofuseinacompletepackage,popularplatformforsharingoral
histories.
Pleasenote:thisapphasnotbeenoptimizedforiPadsandsomeusershavehad
troublewithsavingrecordings.
VoiceRecordPro(iOS)
1. PlaceyourdeviceintoAirplanemodeandsilenceall
notificationsandalarmsthatcoulddisturbtherecording
process.Ensurethatthedevicebatteryisfullandavoid
plugginginthedevicewhilerecording.
2. DownloadVoiceRecordProfromtheAppStore
3. Opentheappandaccessthesettingsbypressingthegear
iconontherightsideofthescreenandclickingon“Settings”
a. Underthegeneralsettings,increasethe“Minimum
Space”toatleast“500MB”—thiswillhelptoensure
thatthereisenoughspaceonthedeviceforyour
recording.Press“Done”intheupperright.
4. Pressthered“Record”buttonnearthetopofthescreenand
pressthe“Advanced”tab.
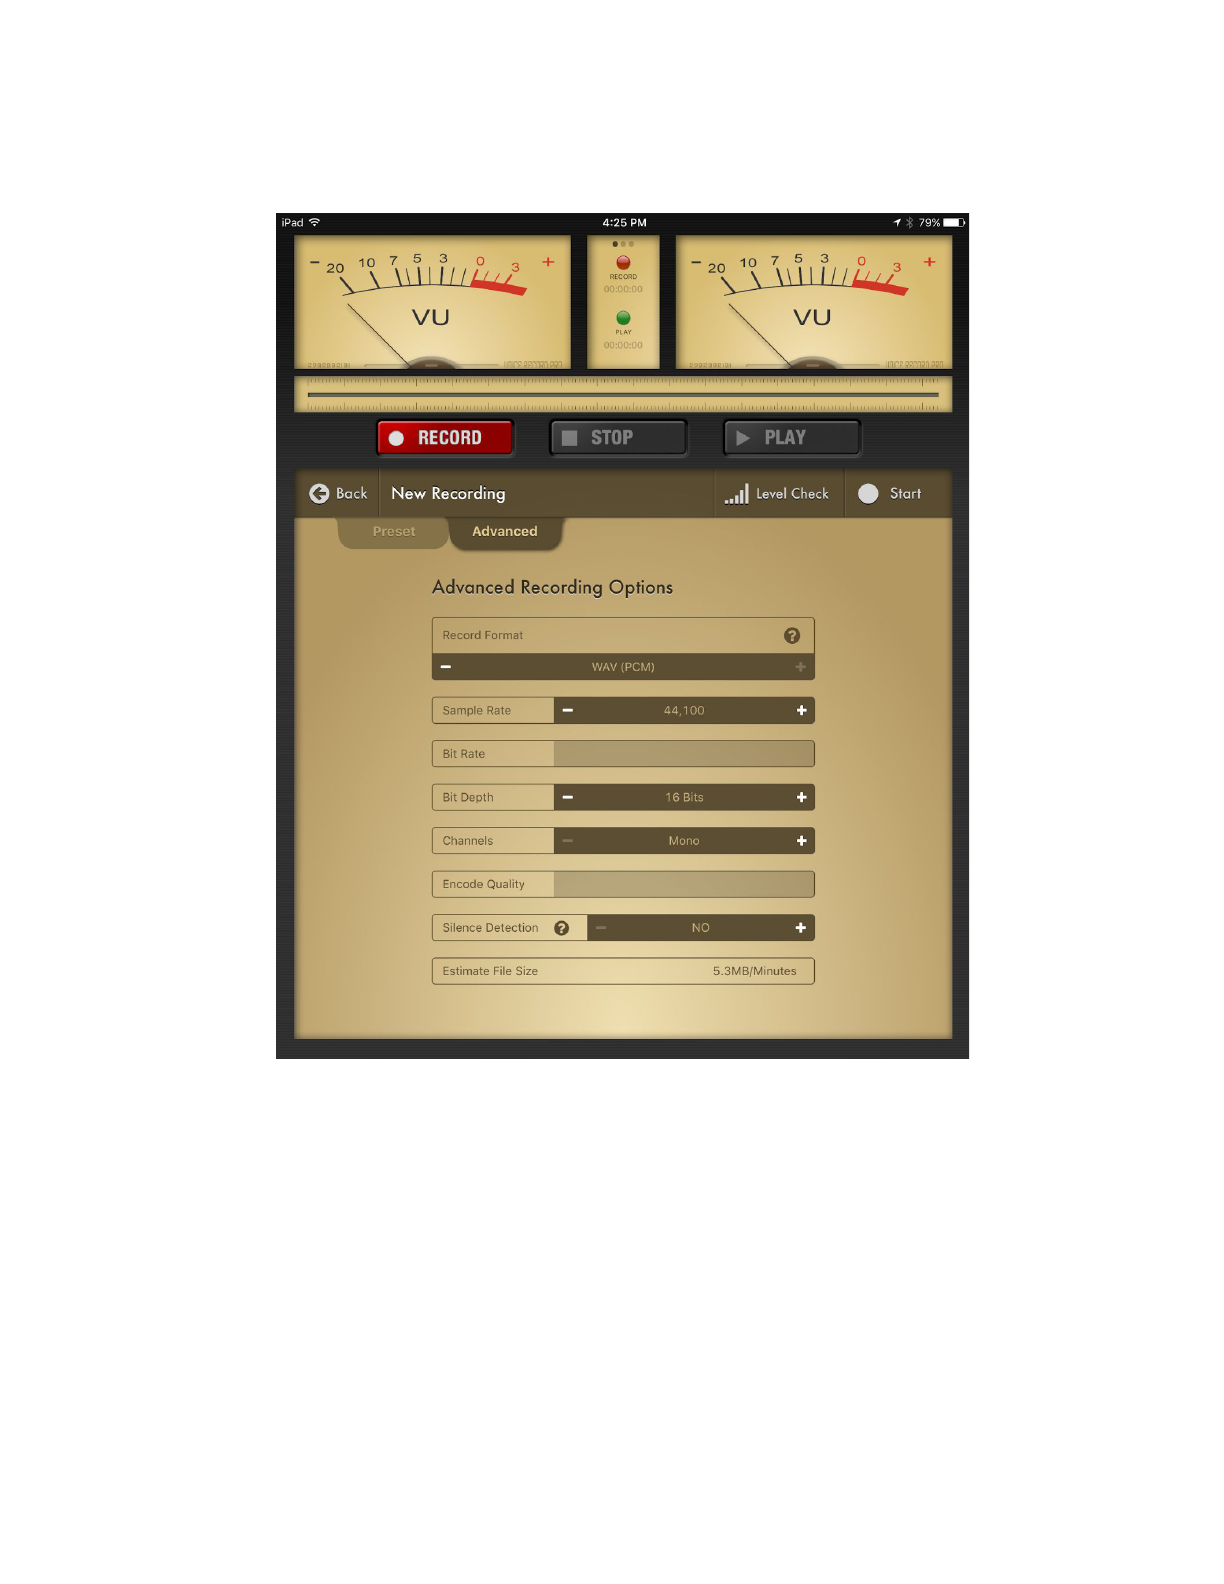
a. Changethesettingstothefollowing:
i. RecordFormat:WAV(PCM)
ii. SampleRate:44,100
iii. BitDepth:16Bits
iv. Channels:Mono
v. SilenceDetection:No
b. Press“LevelCheck,”placethedeviceintothecenterofthetable,equidistant
betweentheinterviewerandthenarrator..
i. Speakingatanormalvolume,theVUmetersshouldreacharound5or
3dB,withoutgoingpastthe0intotheredzone(clipping).Ifthelevels

arebelowthisrange,slidetheInputGaintotheright.Ifthelevelisgoing
abovethe0,slidetheInputGaintotheleft.
ii. Ifthenarratorisquieterthantheinterviewer,movethedevicetoward
him/her.Iftheintervieweristooquiet,movethedevicetowardthe
interviewer.
iii. Press“Done”whenthelevelsarewithinrange.
5. Beforerecording:
a. PlaceyourdeviceintoAirplanemodeandsilenceallnotificationsandalarmsthat
coulddisturbtherecordingprocess.
b. Ensurethatthedevicebatteryisfullandavoidplugginginthedevicewhile
recording.
6. Withthedevicestillinthecenterofthetable,press“Start”tobegintherecording.
a. Theredlightatthecentertopofthescreenwillblinkduringtherecording,and
thetimerbelowwilltrackthelengthoftherecording.
b. AlthoughthereisasliderforchangingtheInputGainduringarecording,
changingthelevelsinthemiddleofarecordingisnotrecommended,andshould
onlybedoneiftheVUmetersareshowinglevelsthatareextremelylowor
extremelyhigh.
c. Press“Stop”toendtherecording.
7. Chooseafilesharingplatformthatyouuse(GoogleDrive,Dropbox,Box,etc)toupload
thefileintothecloud.
i. Thefileshouldbeuploadedtoafoldernamed“VoiceControlPro”within
yourfilesharingplatform.

ii. Renamethefilestoreflectyournamingconventions(e.g.
“20151222Perry.WAV”).
b. Thefile(s)willnowbeaccessibleonadesktopcomputerwithAudacity,which
canbeusedtoedittherecordingandexportitintoaccessandarchivalfiles.(see
theProcessingtheRecordingsectionabove)
i. Whenopeningthe.WAVfileinAudacity,youwillbepromptedtochoose
animportmethod,it’srecommendedto“makeacopyoftherecording
beforeediting”incaseyoumakeamistakeandneedtogobacktothe
sourcerecording.
ii. Therewillbenoneedtousethe“SplitStereotoMono”function,sincethe
recordingwillalreadybeinmono

UploadingOralHistoriestoNYHeritage
Oralhistoryinterviewsshouldbeuploadedascompoundobjectssothattheaudiofiles,
photograph,transcriptsandanyotherrelatedmaterialsaregroupedtogetherasasingledigital
object.
Ifuploadingalargenumberoforalhistoriessimultaneously,itisrecommendedtousea
tabdelimitedfile.Forasmallnumber(510)oforalhistories,themanualprocessdescribed
belowistypicallymoreefficient.
OrganizingFiles
1. Organizethefiles(MP3recording,PDFtranscript,andphotograph)suchthateachoral
historyinterviewhasitsownfilefolder.Itishelpfultohaveaconsistentnaming
conventionforallfiles.Foldernameshouldcorrespondtothetitleoftheoralhistory
(e.g.“RyanPerryOralHistory”),sincethefoldernamewillbeusedasthenameforthe
compoundobjectinCONTENTdm.
CreatingCompoundObjectsinCONTENTdm
Forvideofilesorlargeraudiofiles,itwillbenecessarytousethedesktopProjectClient.The
WebAdminclientwillnotbeabletouploadlargerfiles.
2. OpentheCONTENTdmProjectClient.
3. Ifstartinganewproject
a. OnthemenubarselectProject>New
b. EnsurethattheCONTENTdmServerURLis:
https://server16694.contentdm.oclc.org/andfillinyourWorldCatUsernameand
password
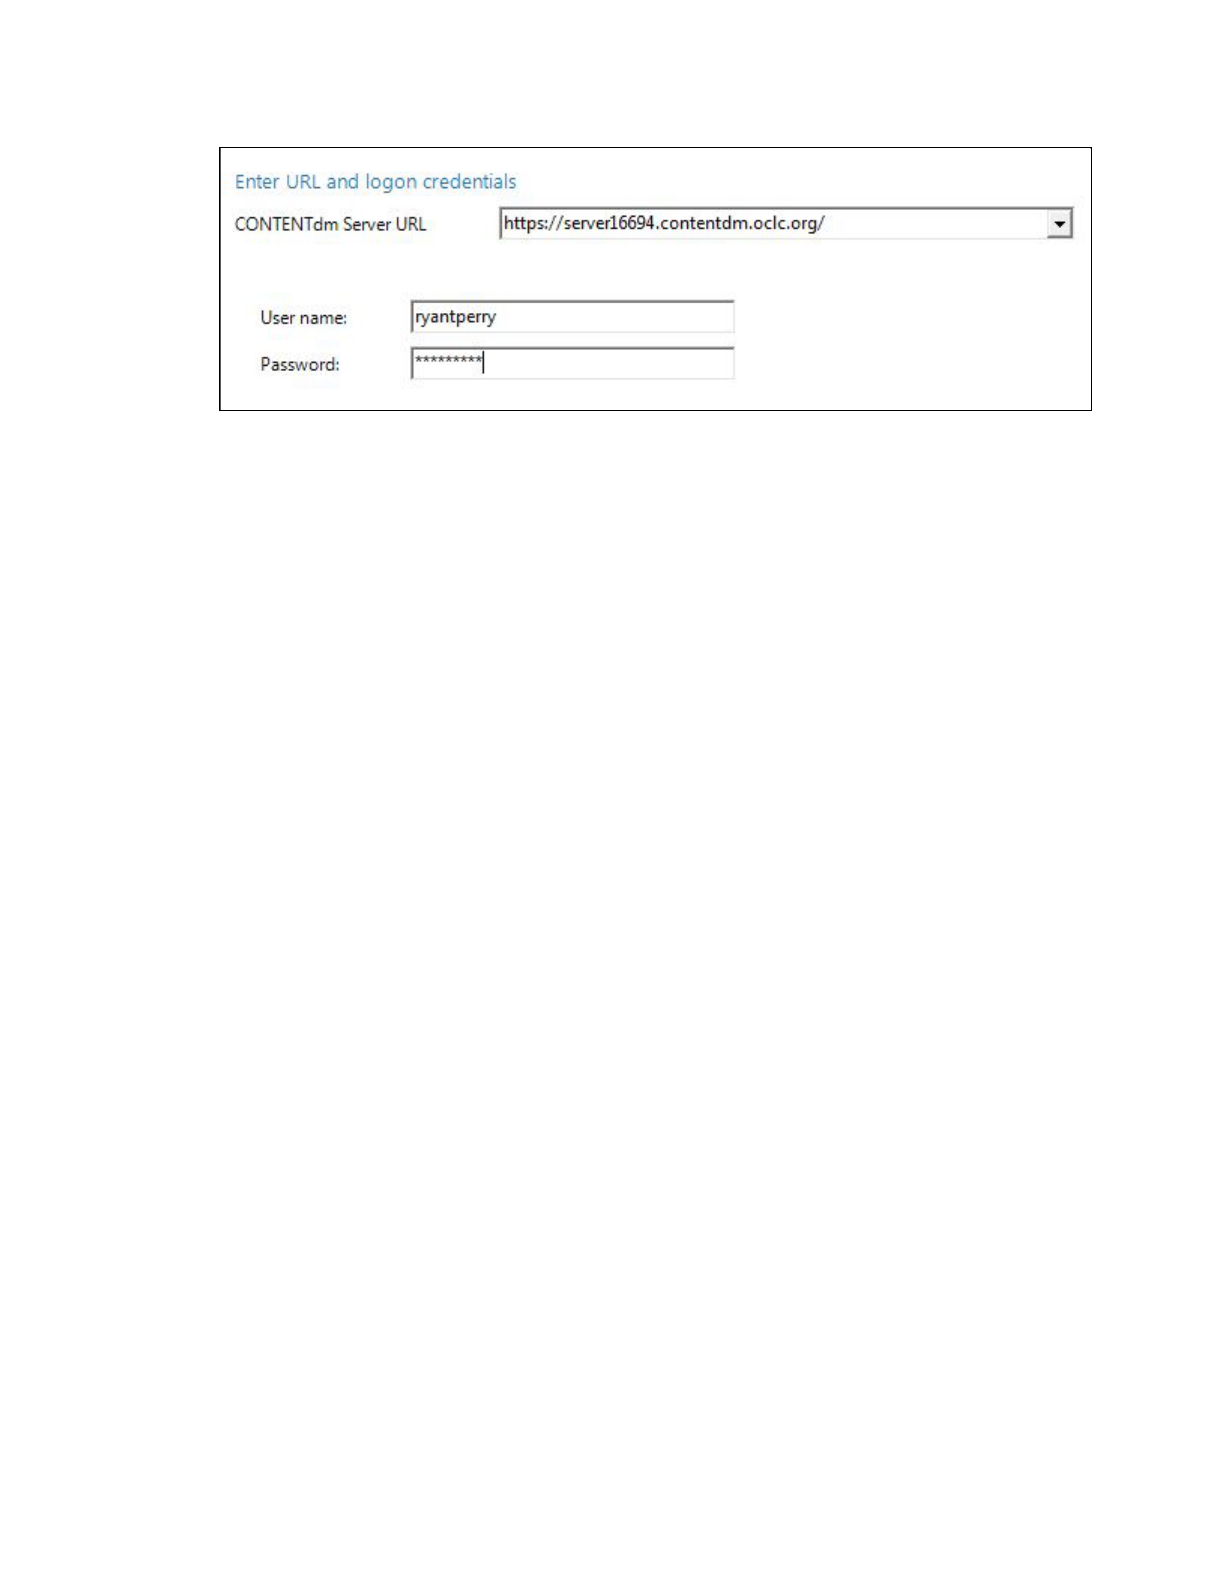
c. Chooseyourinstitutionfromthedropdownbox
d. Nametheproject.Thisnameisonlyseenbythepersonenteringmetadata,soit
neednotbeanofficialtitle.
e. Click“Finish”
4. Clickonthetabatthetopthathastheprojecttitlefromthepreviousstep.Thisisyour
workspaceforpreparingdigitizeditemsforuploadtoNewYorkHeritage.
5. Clickon“AddCompoundObjects”ontheleftsideofthescreen.Ensurethat
“CompoundObjectWizard”isselectedinthedropdownandclick“Add.”
a. Onthe“ChooseType”screen:
i. Whattypeofcompoundobjectwouldyouliketocreate?—select
“Document”
ii. Arethecompoundobjectstructureandmetadatadefinedbya
tabdelimitedtextfile?—select“No”
iii. Click“Next”
b. Onthe“SelectDirectory”screen:
i. Browseforthedirectorycontainingthefilesforasingleoralhistory
interview
ii. Click“Next”
c. Onthe“DisplayImageSettings”screen:
i. DoyouwantCONTENTdmtogeneratedisplayimagesfromyou[sic]
import?—select“Yes”
ii. Click“Next”
d. Onthe“PageInformation”screen:
i. Specifypagenames—select“Usefilenamesastitles”(youwillneedto
manuallyrenametheselater)
ii. Transcript—select“Notranscripts”
iii. PDF—leaveboxunticked
iv. Click“Next”
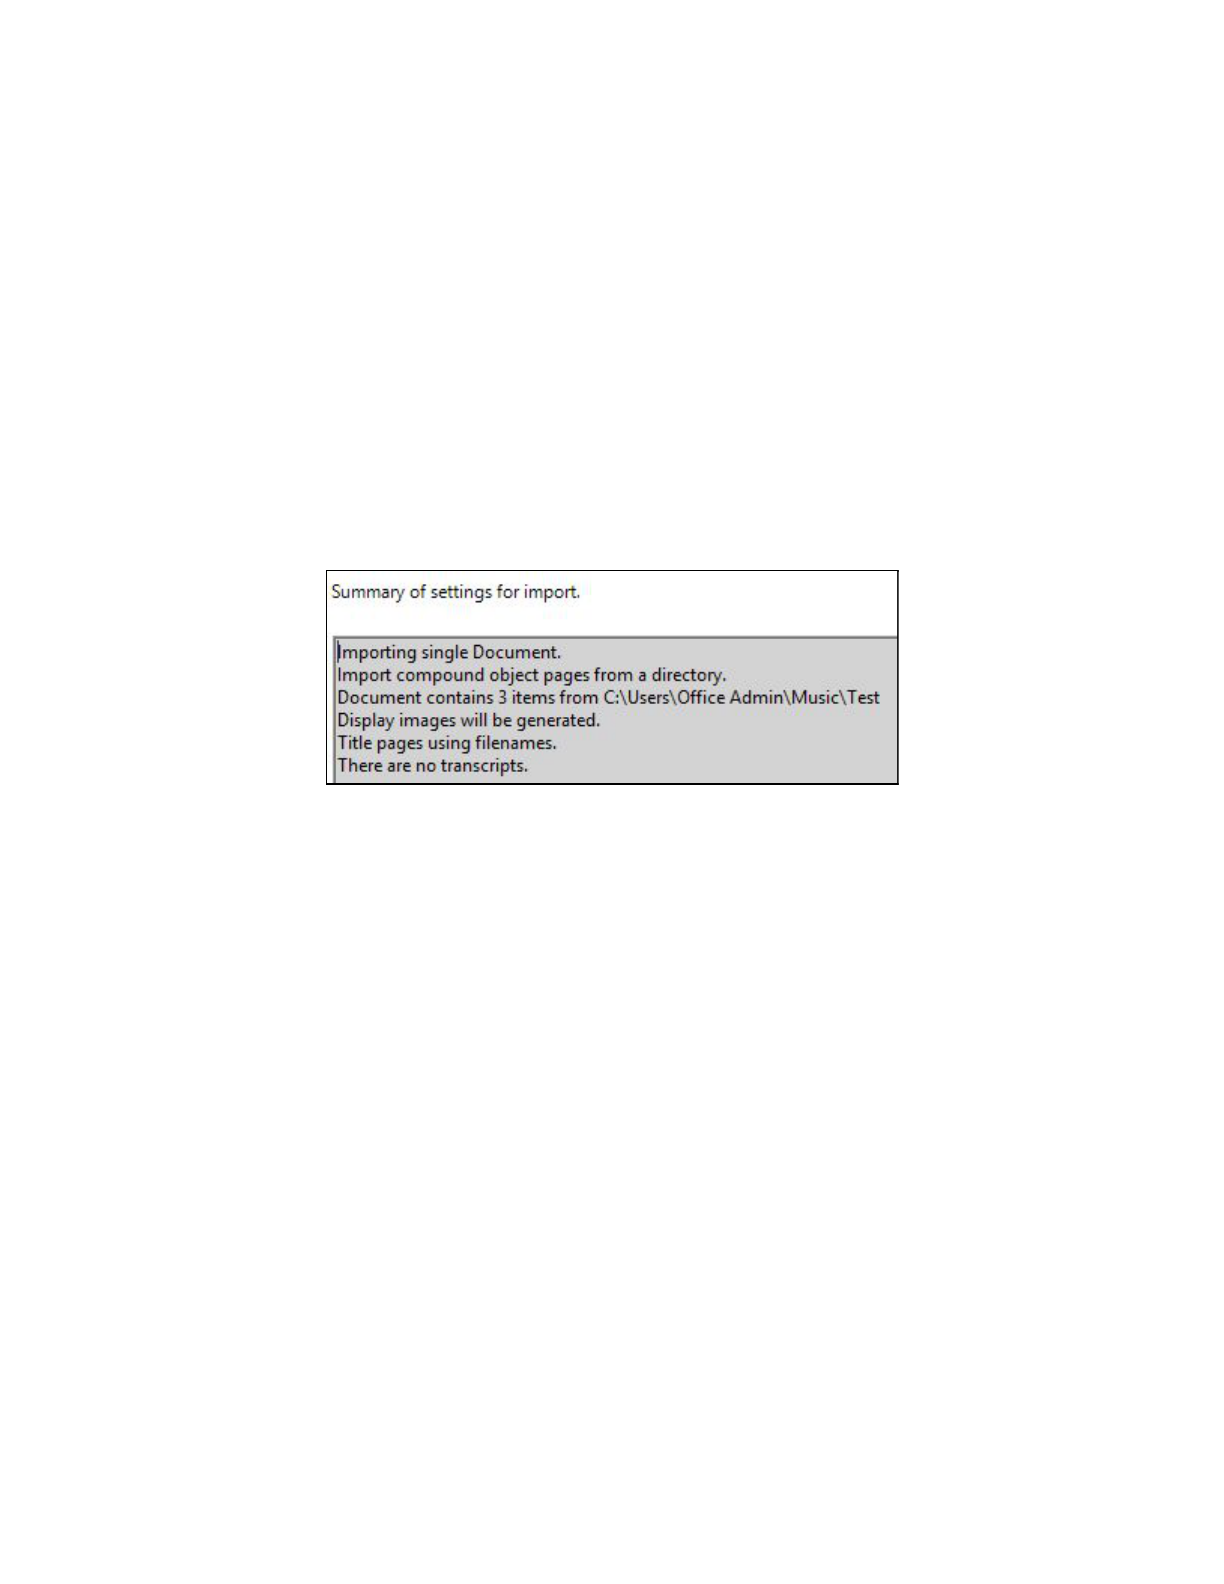
e. Onthe“ConfirmSettings”screen:
i. Confirmthatyoursettingsareequivalenttothefollowing(withthe
relevantdirectory)
ii. Click“Finish”
f. Confirmthattherearenotanyerrorsonthe“Summary”screenthenclick“Close.”
6. Ifyouareaddingmultipleoralhistoriesatonce,youmayrepeatStep5toaddan
additionalcompoundobjectforeachinterview.
7. Whenallcompoundobjectshavebeenadded,click“Finish”inthelowerrightcornerof
the“AddMultipleCompoundObjects”screen.
a. Awarningmayappear,indicatingthatathumbnailcouldnotbecreatedforthe
mp3filethisshouldnotbecauseforconcern,asthethumbnailcanbereplaced
later.
b. Click“Close”

FixingCompoundObjectStructure&Adding
Metadata
Whenuploadingcompoundobjects,thenamesgiventoeachpage(orseparateitemaudio,
transcript,etc.)correspondtothefilenames.Itisrecommendedthatthesepagesberetitledto
makeiteasierforuserstoidentifyanddifferentiatebetweenthecomponents.Whileitis
possibletofixthiswithacsvfileduringtheupload,itisofteneasiertofixafterthecompound
objectshavebeenaddedtotheprojectandbeforetheyareuploadedtoNYHeritage.
1. Whileintheprojecttab,doubleclickonanitem’sthumbnailimagetoentersingleitem
view.
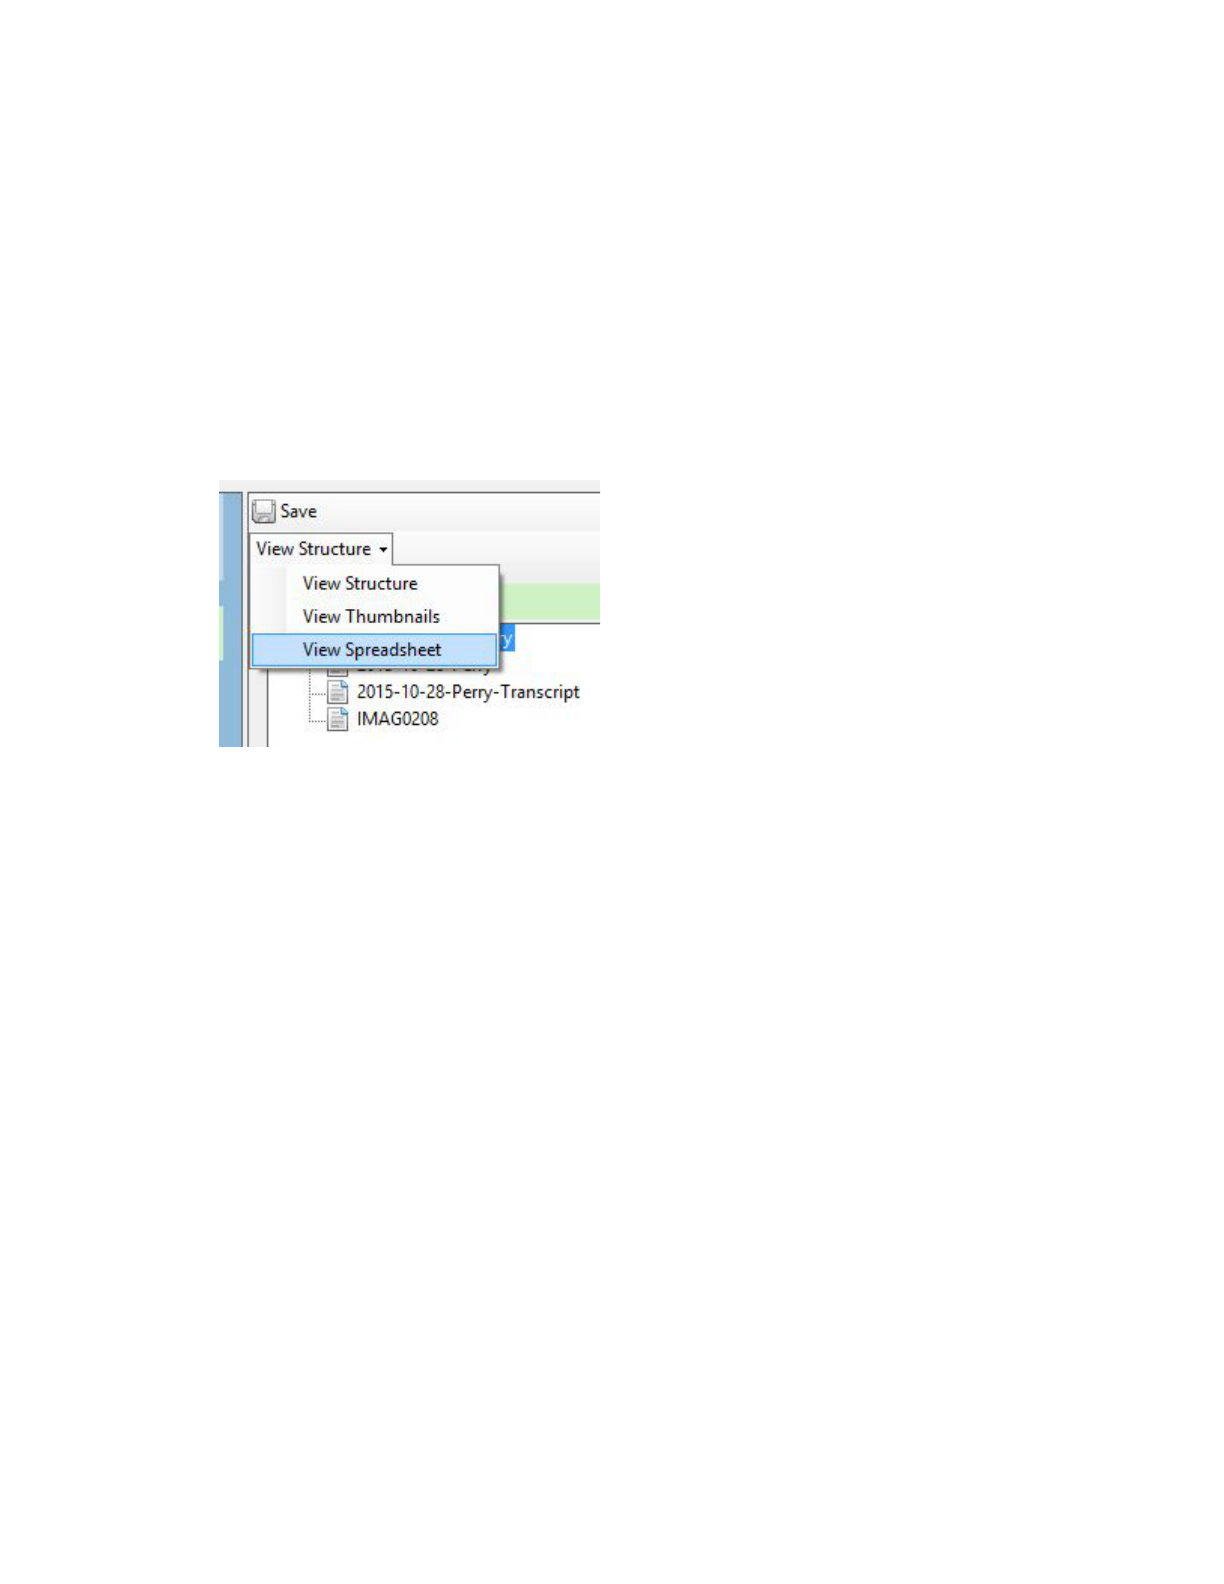
2. Eachconstituentitemhasapagenameinthestructure(e.g.“20151028Perry”inthe
aboveimageisthenameofthepagefortheaudiorecording).
a. Tochangethesepagenames,clickonceonthename,wait2secondsthen
singleclickthenameagaintoeditit.Suggestednames:“AudioRecording”,
“Transcript”,and“Photograph”
b. Toreplacethethumbnailforthecompoundobjectandaudiofile,selectthepage
nameandclick“ReplaceThumbnail”ontheleftsideofthescreen.
i. Click“Browse”andselectanimagefiletoserveasthethumbnail.
Typicallythiswouldbeaphotographtakenoftheoralhistorynarrator.
3. Enterthemetadatafortheobjectanditsconstituentitemsusingthefieldsontheright
sideofthescreenorclickonthe“ViewStructure”dropdowntoswitchviews.
4. Besuretoentertherequiredfields(Title,CollectionID,Rights,andFileName)forall
constituentitemsineachcompoundobject.Thespreadsheetviewwillshowallitems
simultaneously,makingiteasiertoconfirmthatallrequiredfieldshavebeencompleted.
5. Oncethemetadataiscomplete,thecompoundobjectscanbeuploadedforapproval.
UsingtheInternetArchiveasanalternativeaccess
locationforaudioandvideofiles
Youmaywanttoprovideanalternativeaccesslocationforyouraudioandvideofiles.Thisis
notrequired,butcouldhelpimprovetheexperiencefortheenduser.Therearevariousfactors
thatcanaffectauser’sabilitytoplayanaudioorvideoonNewYorkHeritage,including
variancesinbrowsers,flashplugins,etc.Forthisreason,werecommendusingtheAlternate
Accessmetadatafieldtoaddalinktoanexternalcopyofthefile.Therearevariousoptions
availablesuchasYouTube,Vimeo,SoundCloud,ortheInternetArchive.Werecommendusing
theInternetArchive
becauseitiscommittedtoofferingpermanentonlineaccesstoresources,
andplayswellontabletsandmobiledevices.
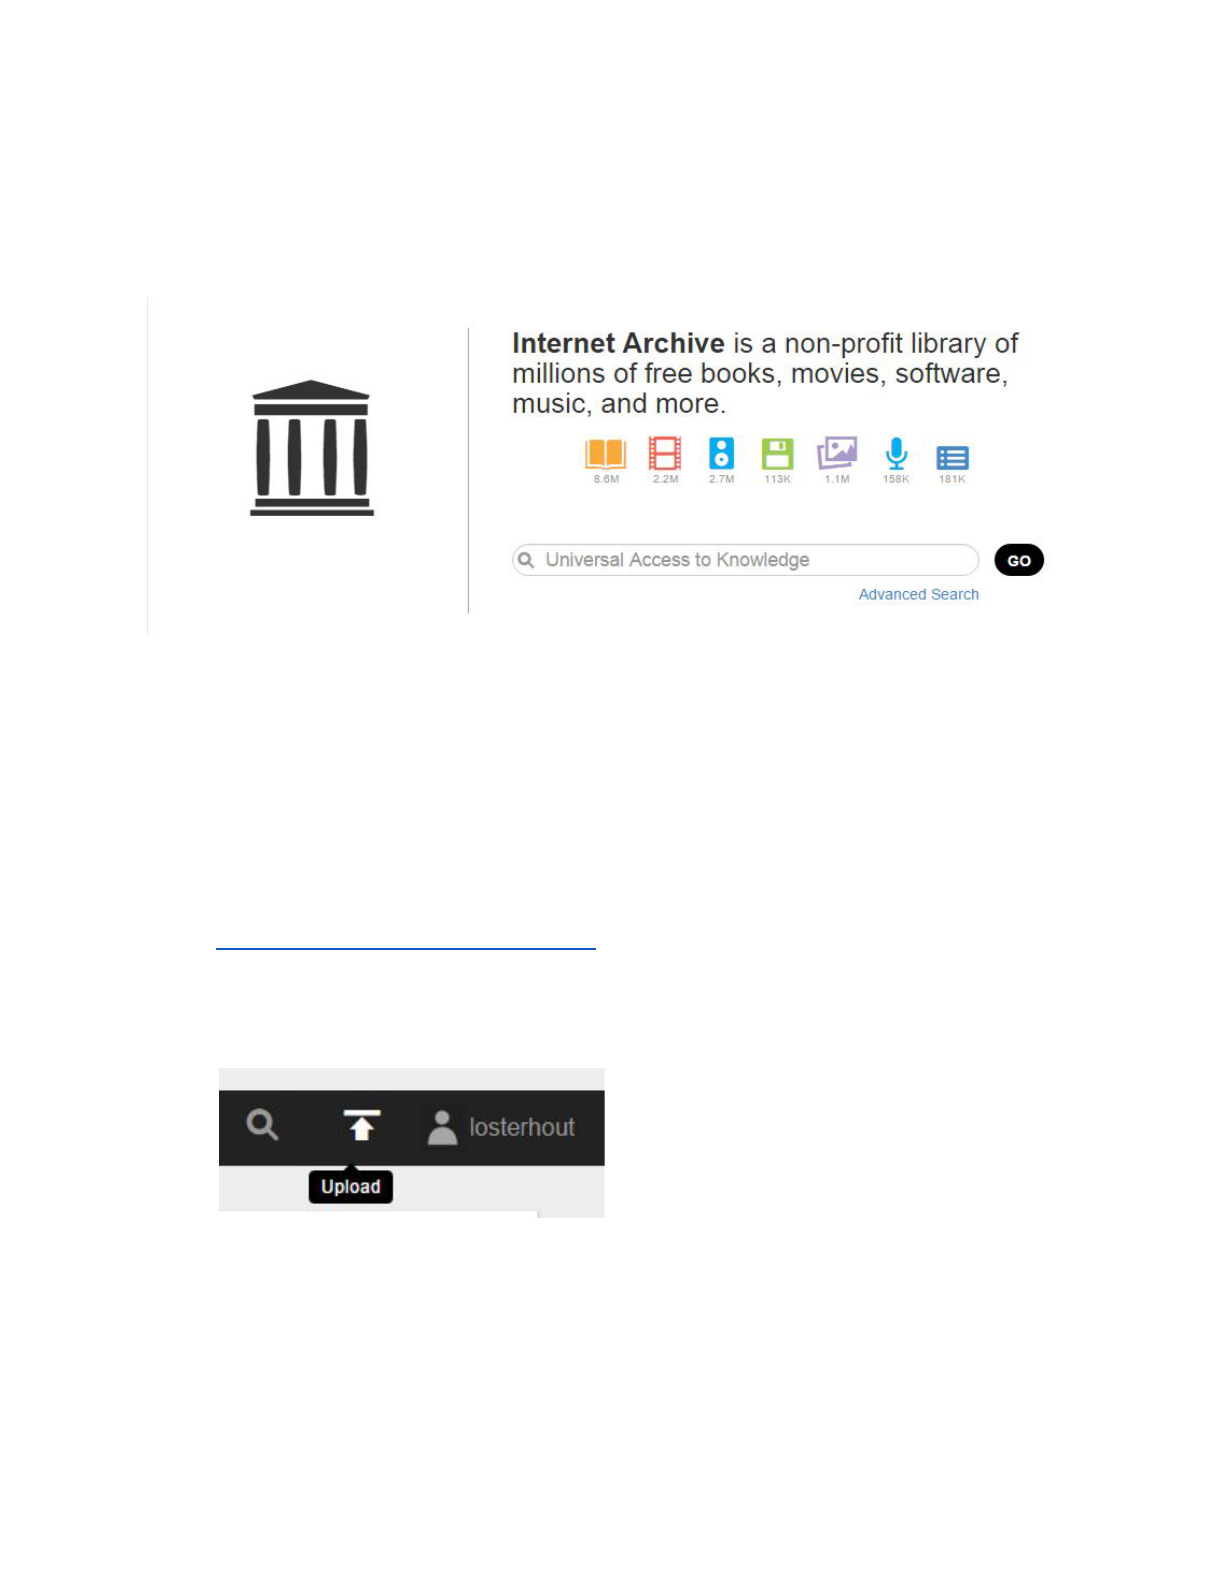
1. SignupforanInternetArchiveaccount.
2. Makesureyou’reloggedintotheaccount,andthenclicktheUploadbuttoninthemenu
bar.Alternatively,youcangotoyouraccountpageandthereisanuploadoptiononthat
screenaswell.
3. Followthepromptstouploadafile.
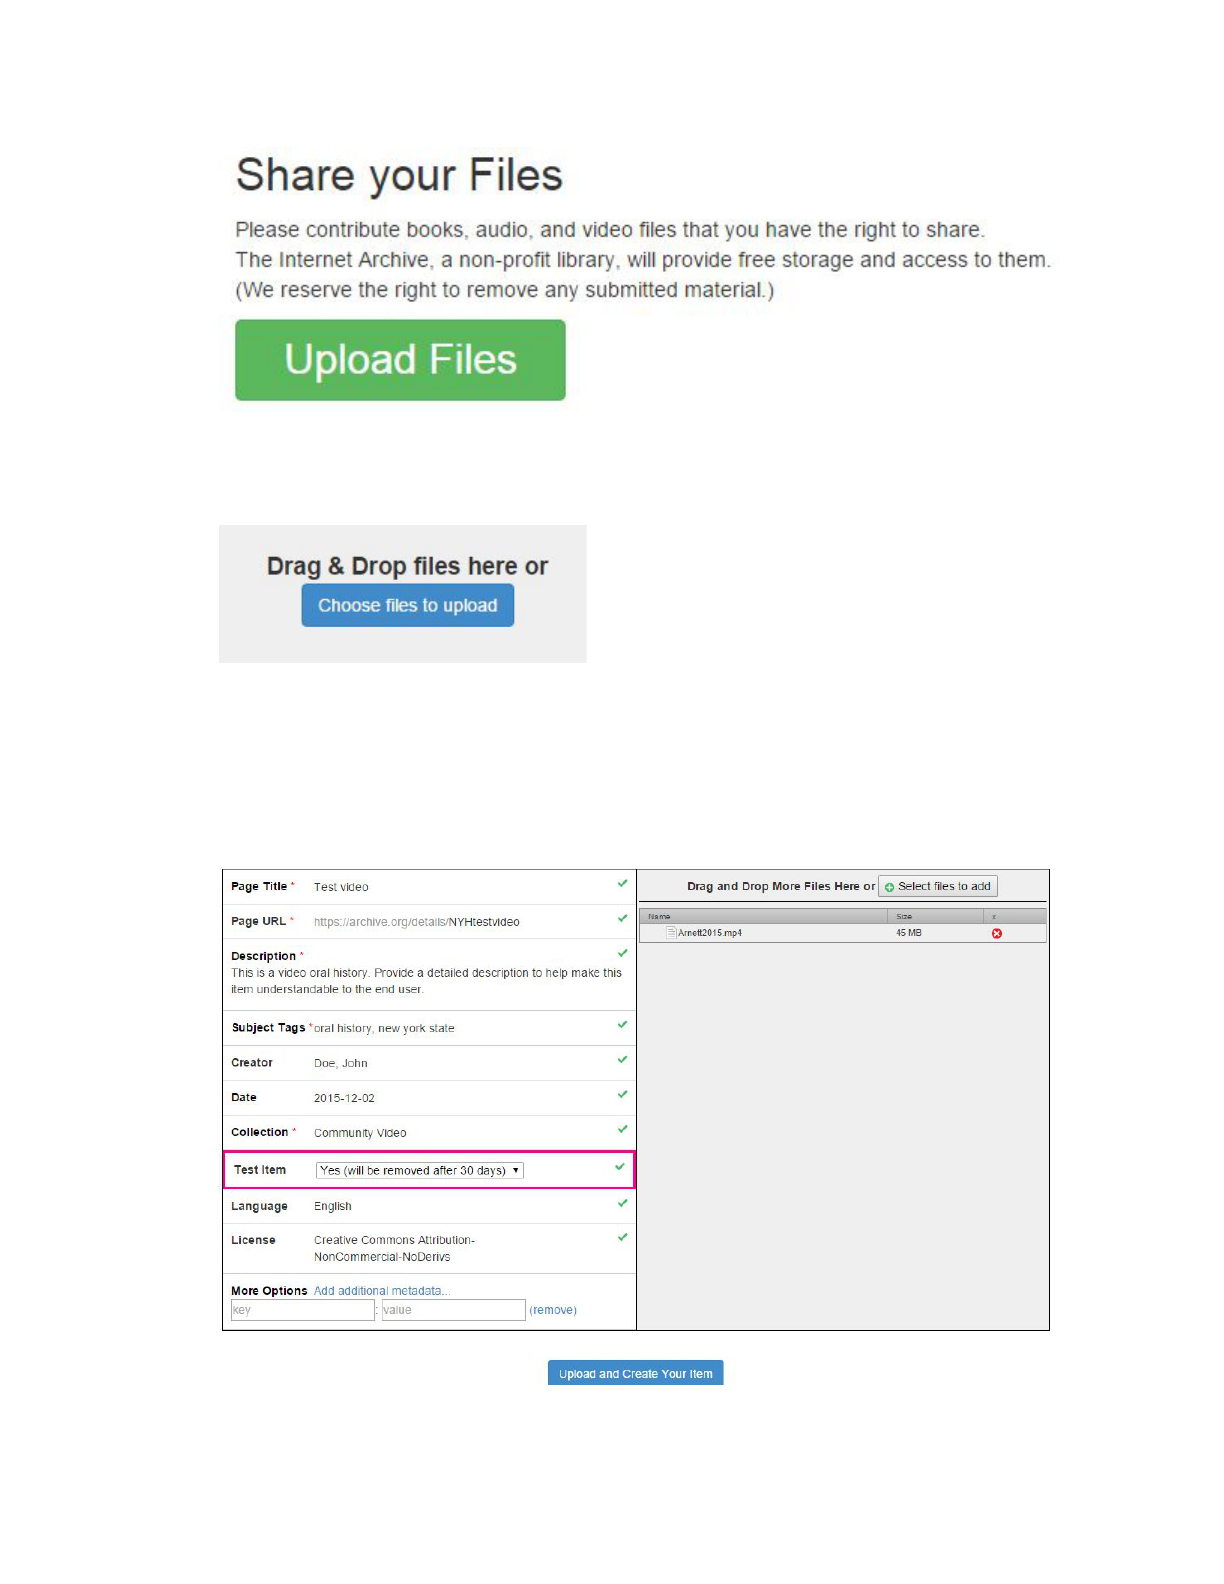
4. Toselectafileforupload,draganddropitintothebox,orclickChoosefilestoupload
to
selectfromalistoffilesonyourcomputer.
5. Onceyouhaveselectedafile,themetadatascreenwillopen.Recordtheappropriate
metadatatomaketheitemunderstandable,usingsomeofthesamemetadatafromthe
CONTENTdmitem.Youcanalsoselecttoapplyalicense(suchasCreativeCommons)
tothefile,andhavetheoptiontoenteradditionalmetadatafields.*Notethatthereisa
fieldcalledTestItem,whereyoucandesignateanitemtoberemovedafter30days.
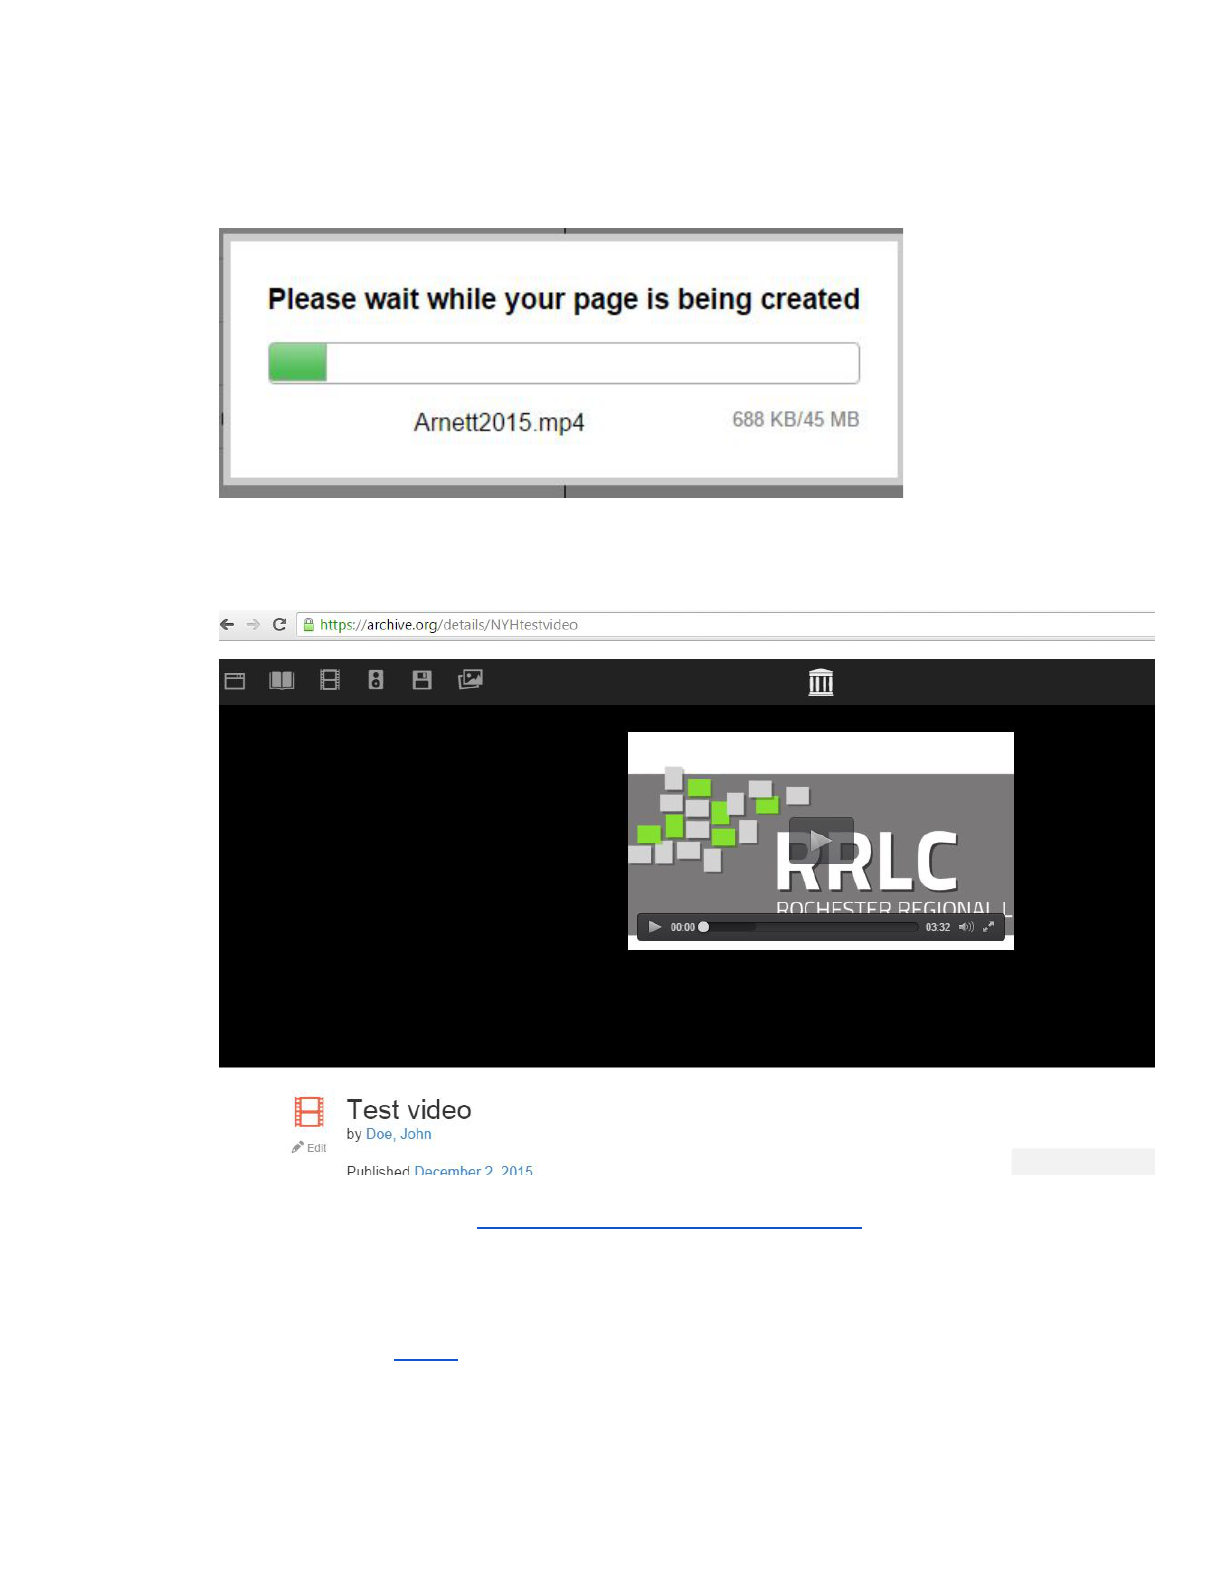
6. ClickUploadandCreateYourItem.Theuploadmaytakeafewminutesdependingon
thesizeofyourfile.
7. Oncetheuploadcompletes,you’llberedirectedtotheuploadeditem,andwillbeableto
playthefileandviewthemetadata.
8. NotetheURLoftheitemhttps://archive.org/details/NYHtestvideothisistheURLthat
youwillputintotheAlternateAccessfieldinCONTENTdm.
WatchthisshortvideoonScreencast.comforatutorialoftheuploadprocess.
